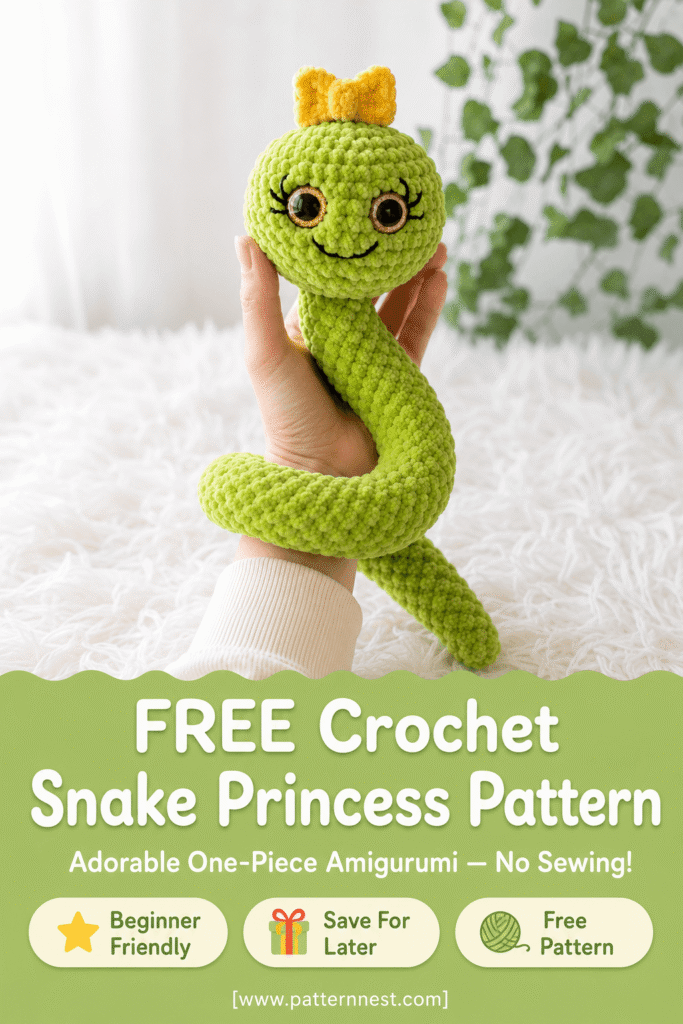
Crochet Mini Snake Princess: A Free One-Piece Amigurumi Pattern

The Cutest Crochet Snake You Will Ever Make — No Sewing Required
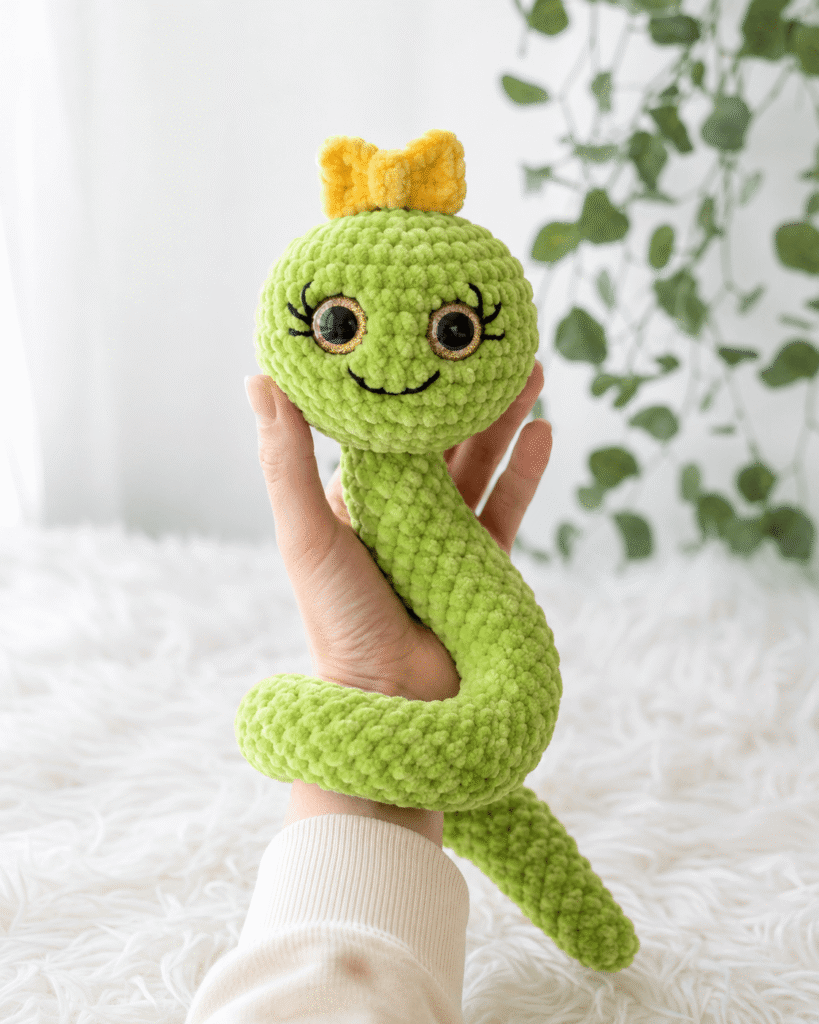
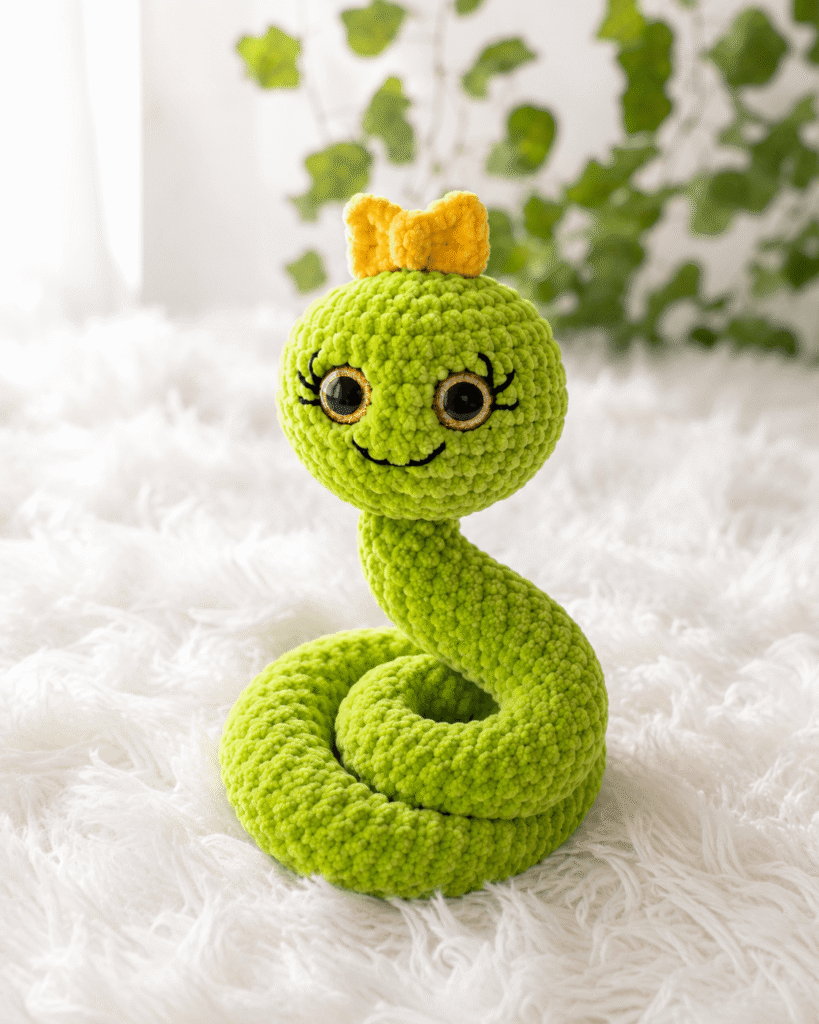
If you have been scrolling Pinterest and spotted an irresistibly chubby little crocheted snake with sparkly eyes and a tiny yellow bow on her head, this is the pattern that makes her. Meet the Mini Snake Princess — a one-piece amigurumi crochet project worked almost entirely in the round, made with ultra-soft chenille yarn in Apple Green with a sweet Sunny Yellow bow crown.
This little snake is beginner-friendly, shockingly fast to complete, and produces a result that looks far more impressive than the skill level required. She makes an incredible handmade gift for babies, toddlers, kids, and honestly anyone who appreciates something irresistibly cute. She works up in a single afternoon, and her squishy chenille texture means she is every bit as huggable as she looks.
In this tutorial, you will learn how to crochet the Snake Princess from head to tail, add her signature gold-rimmed safety eyes and embroidered eyelash details, and finish her with a tiny Sunny Yellow bow crown that sits right on top of her round little head. Let’s get started.
Frequently Asked Questions
Is this amigurumi pattern beginner friendly?
Yes, with one small caveat. If you have never crocheted in the round before, this project will teach you that skill along with everything else. The pattern uses single crochet worked in a continuous spiral — the most fundamental amigurumi technique — so once you can make a magic ring and crochet in the round, you have everything you need. The one-piece construction means there is almost no sewing or assembly, which removes the most frustrating part of amigurumi for most beginners. If you are truly brand new to crochet, practice your single crochet stitch for 30 minutes first, then jump in.
What yarn works best for this snake amigurumi?
The soft, chunky, squishy look in the finished Snake Princess comes entirely from the chenille velvet yarn. This is a polyester plush yarn that has a velvety pile — it is the same yarn used for the ultra-popular “no eyes” style amigurumi that have been all over Pinterest for the past few years. Brands to look for include Bernat Blanket yarn, Lion Brand Pound of Love Velvet, Yarn Art Dolce, or any polyester chenille in a bulky weight. Using regular acrylic yarn will produce a very different texture and appearance. For this specific look, chenille is essential.
How long does it take to crochet the Snake Princess?
Most crafters complete this project in 4 to 6 hours. The body is one long continuous tube worked in the round, which moves quickly once you find your rhythm. The head is a separate round piece crocheted in the round and then stuffed. The bow crown is the smallest piece and takes only 20 to 30 minutes. If you set aside a full afternoon, you can very realistically have a finished Snake Princess in your hands by evening.
What size will the finished snake be?
The finished Mini Snake Princess measures approximately 10 to 12 inches from the top of her head to the tip of her curled tail. Her head is approximately 3 to 3.5 inches in diameter when stuffed. She is a perfect palm-sized toy — large enough to be substantial and huggable, small enough to be safe for older children and to display beautifully on a shelf.
Can I change the colors?
Absolutely. The Apple Green and Sunny Yellow combination gives her that iconic, vibrant look, but you could make her in soft lavender with a white bow, pale pink with a golden yellow crown, mint green with a peach bow, or any color that calls to you. The pattern structure is identical regardless of color. Just remember to keep the body color consistent throughout the head and body sections so the finished piece looks unified and polished.
Materials Needed
Everything you need to make the Mini Snake Princess is listed below. These materials were chosen specifically to replicate the soft, plush, squishy texture visible in the finished toy.
Yarn:
- Main Color (MC): Apple Green chenille / velvet plush yarn — bulky weight (Category 5) — approximately 100–120 yards. Bernat Blanket yarn in “Green Apple” or Yarn Art Dolce in a bright apple green are ideal matches.
- Accent Color (AC): Sunny Yellow chenille / velvet plush yarn — bulky weight (Category 5) — approximately 15–20 yards. You need very little for the bow, so a small leftover ball works perfectly.
Tools and Notions:
- 4.0 mm (G/6) crochet hook — this slightly smaller hook creates a tighter stitch that prevents the polyester fiberfill from showing through the chenille fabric
- Two 14mm or 16mm gold-rimmed glitter safety eyes — the gold iris ring is what gives the Snake Princess her signature sparkly, expressive look
- Black embroidery thread — for stitching the curved smile and delicate eyelash lines above each eye
- Embroidery needle — for the face embroidery
- Polyester fiberfill stuffing — for the head and upper body
- Stitch marker — to mark the beginning of each round in the continuous spiral
- Scissors
- Tapestry needle — for weaving in yarn ends
Why chenille yarn? The plush pile of chenille velvet yarn is what creates the instantly recognizable squishy, velvety texture of this style of amigurumi. It photographs beautifully, feels irresistible to touch, and gives the finished toy a premium, boutique quality that regular acrylic simply cannot replicate.
Skill Level
Skill Level: Beginner–Intermediate Stitches Used: Magic ring, Single crochet (sc), Increase (inc), Decrease (dec), Slip stitch (sl st), Chain (ch) Estimated Time: 4–6 hours Finished Dimensions: Approximately 10–12 inches head to tail tip; head approximately 3–3.5 inches diameter
Step-by-Step Tutorial
Step 1: Crochet the Head in Apple Green
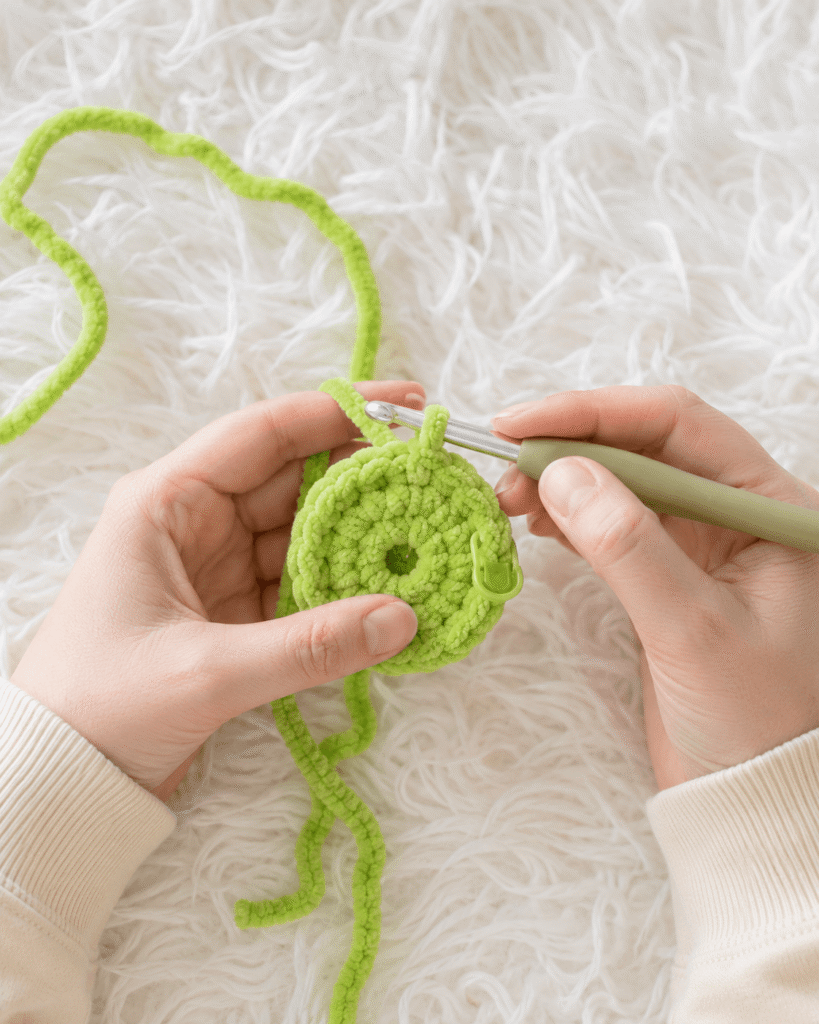
Start with your Apple Green chenille yarn and your 4.0 mm hook.
Make a magic ring. Round 1: Work 6 sc into the magic ring. Pull the ring closed tightly. Place your stitch marker in the first stitch of the round — you will work in a continuous spiral throughout.
Round 2: Inc in each stitch around. (12 sc) Round 3: *Sc 1, inc* repeat around. (18 sc) Round 4: *Sc 2, inc* repeat around. (24 sc) Round 5: *Sc 3, inc* repeat around. (30 sc) Round 6–10: Work even — sc in each stitch around for 5 rounds. (30 sc)
At this point your head should be a pleasing round dome shape in Apple Green. Before continuing, insert your safety eyes between rounds 6 and 7, spaced approximately 8 stitches apart. The gold-rimmed iris should face forward. Press the backing firmly onto each post until it clicks securely.
Using your black embroidery thread and embroidery needle, stitch 3 to 4 small diagonal lines above each eye to create delicate eyelashes, and stitch a small curved smile below and between the eyes.
Round 11: *Sc 3, dec* repeat around. (24 sc) Round 12: *Sc 2, dec* repeat around. (18 sc)
Stuff the head firmly with polyester fiberfill. The head should feel plump and round.
Round 13: *Sc 1, dec* repeat around. (12 sc) Round 14: Dec around. (6 sc)
Slip stitch to close, leaving a long Apple Green tail. Do not fasten off completely — continue directly into the body.
Step 2: Begin the Body Tube in Apple Green

Without cutting your yarn, you will now continue building the Snake Princess’s long, sinuous body directly from the base of the head.
From the 6-stitch closed base of the head, chain 3 and join to the opposite side of the head base to begin the body tube, or alternatively, pick up stitches around the closed base opening and work outward — either method connects the body smoothly.
Body setup: Work 12 sc in a ring at the base of the head to establish the body tube opening.
Then work even — sc in each stitch around — for approximately 40 to 50 rounds, or until the body measures approximately 8 to 9 inches long. The body is a simple single-crochet tube worked in the round. Stuff the body lightly and loosely as you go — just enough to give it gentle shape and squish without making it rigid. The tail end should remain unstuffed and floppy for the curled effect.
As you approach the final 10 rounds, begin tapering the tail:
- *Sc 4, dec* around (10 sc)
- *Sc 3, dec* around (8 sc)
- *Sc 2, dec* around (6 sc)
- Sc around for 3 more rounds on the remaining 6 stitches
Slip stitch to close and fasten off. Weave in the Apple Green tail end.
The body will naturally curl and coil, especially at the unstuffed tail end, giving the Snake Princess her signature relaxed, coiled pose.
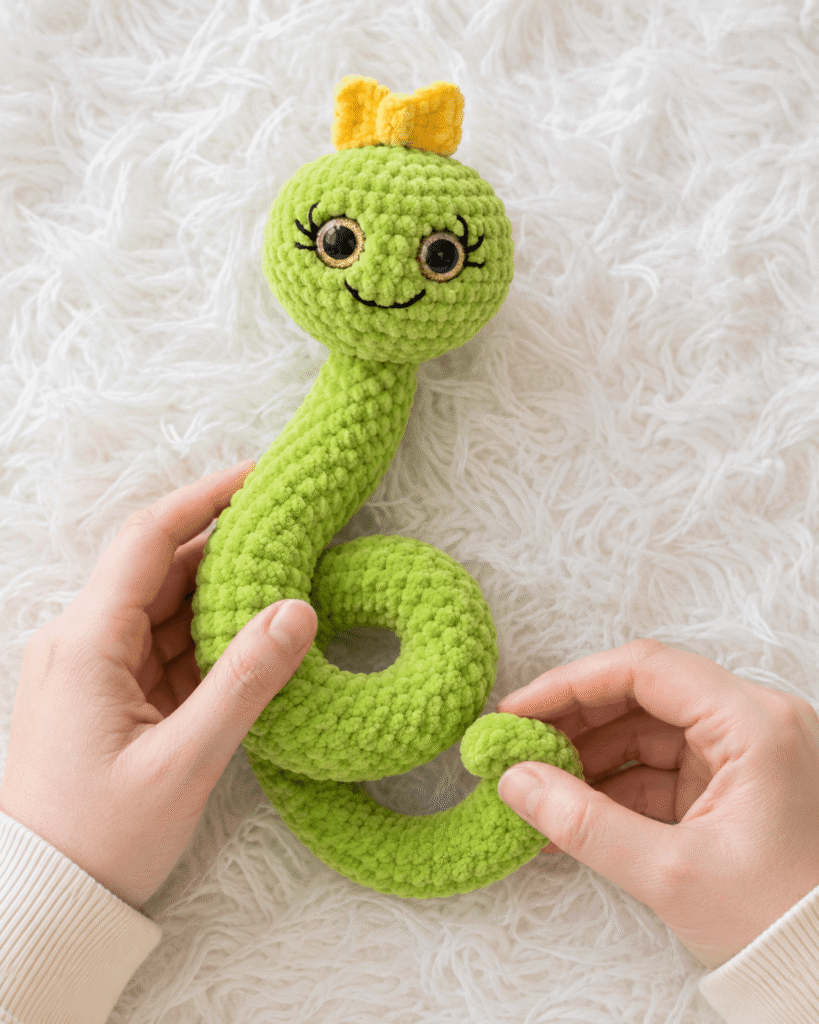
Step 3: Shape and Pose the Snake Princess
With the body complete, take a moment to shape your Snake Princess into her pose. The chenille fabric is soft and flexible enough to be gently arranged.
Curl the tail in a loose loop or S-curve beneath the body. The unstuffed tail tip will hold a gentle curl naturally. If you would like the pose to be more defined, you can run a few invisible tacking stitches with your tapestry needle and Apple Green yarn to hold the tail in a curled position — just run the needle through both layers where the tail touches the body and knot discreetly on the inside.
Check that the head is centered and the face is pointing forward with both gold-rimmed eyes visible and level. The embroidered smile should sit just below and between the eyes. Adjust the fiberfill stuffing through any opening if needed before the head is fully closed.
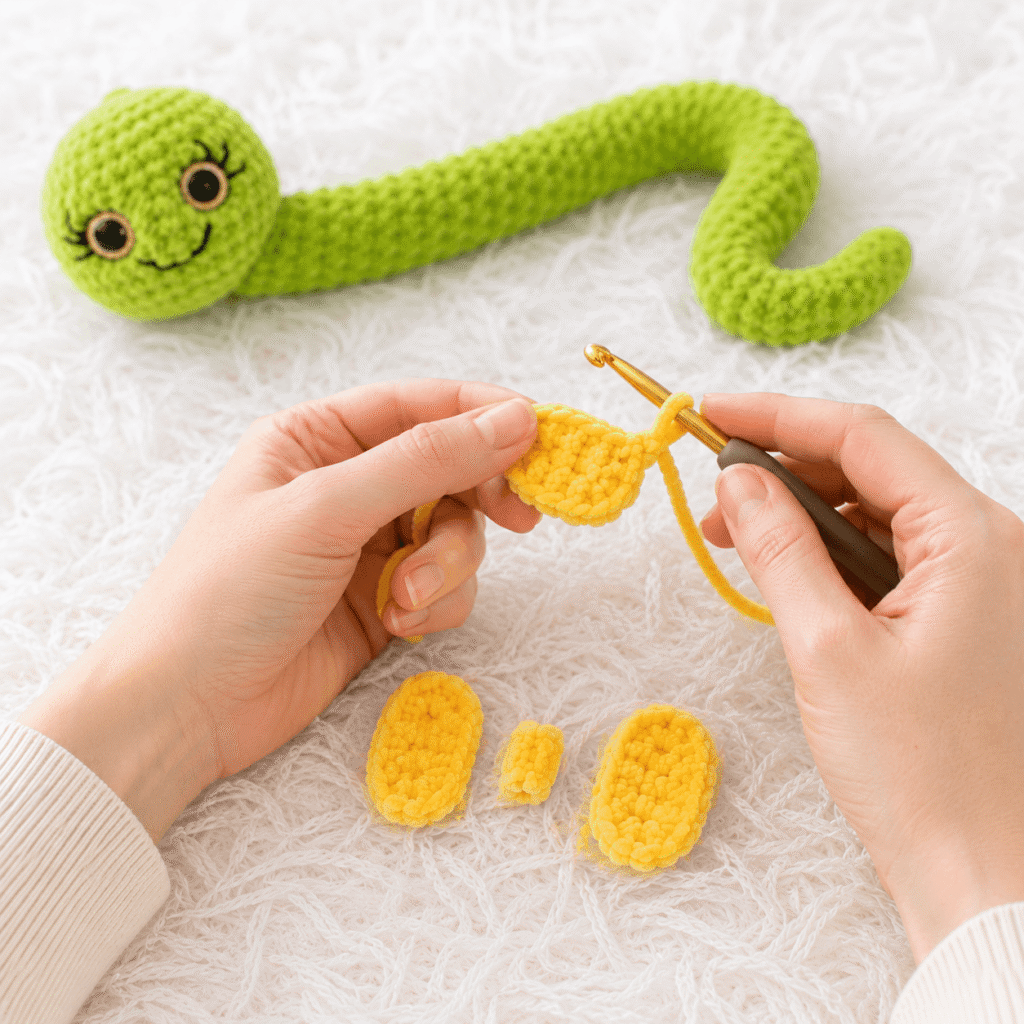
Step 4: Crochet the Sunny Yellow Bow Crown
The bow crown is what transforms a cute snake into a princess. Using your Sunny Yellow chenille yarn and your 4.0 mm hook:
Bow center band: Chain 5. Sc across for 4 rows. Fasten off, leaving a long tail.
Bow loops (make 2): Magic ring, work 8 sc into the ring, join with a slip stitch. Flatten the circle into an oval loop. Make two of these.
Place the two loops side by side and wrap the center band tightly around the middle of both loops, pulling them together into a bow shape. Use the long tail to wrap the band 3 to 4 times around the center, then knot securely on the back.
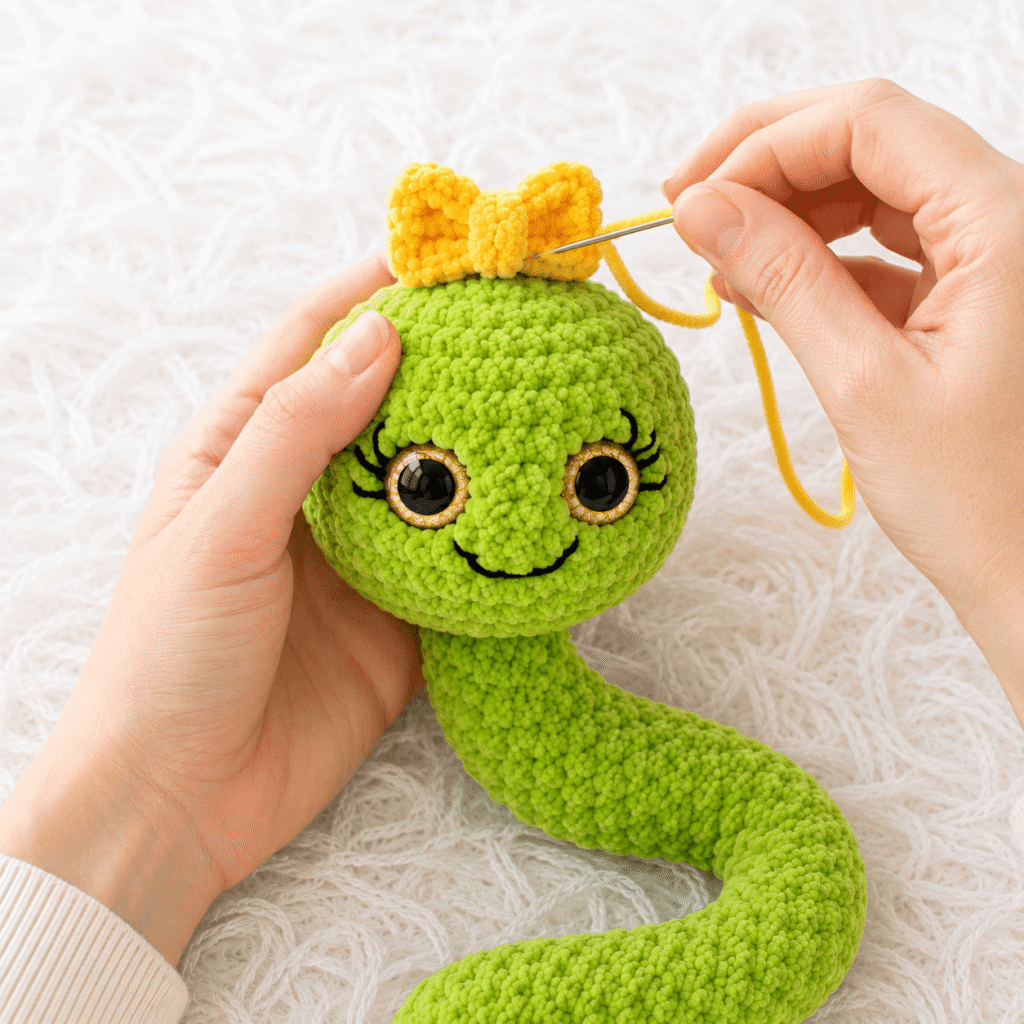
Attach the bow crown to the very top center of the Snake Princess’s head using your tapestry needle and Sunny Yellow yarn. Stitch through the bow and into the head several times until it sits firmly upright. The bow should point upward and look like a little crown or hair bow from the front.
Step 5: Final Face Details and Finishing
With your Apple Green body complete, your Sunny Yellow bow securely attached, and your safety eyes in place, do a final pass on all face embroidery.
Using black embroidery thread:
- Reinforce the smile curve if needed — it should be a small, gentle upward arc
- Check that the eyelash lines above each eye are symmetrical — 3 short diagonal strokes above each eye, fanning slightly outward
Weave in all remaining yarn ends on the Apple Green body and Sunny Yellow bow using your tapestry needle. Trim all tails close to the fabric.
Give your Snake Princess a gentle squeeze and check that all stuffing is evenly distributed, the head feels round and firm, and the body tube is soft and poseable.
Step 6: Style and Display Your Finished Snake Princess
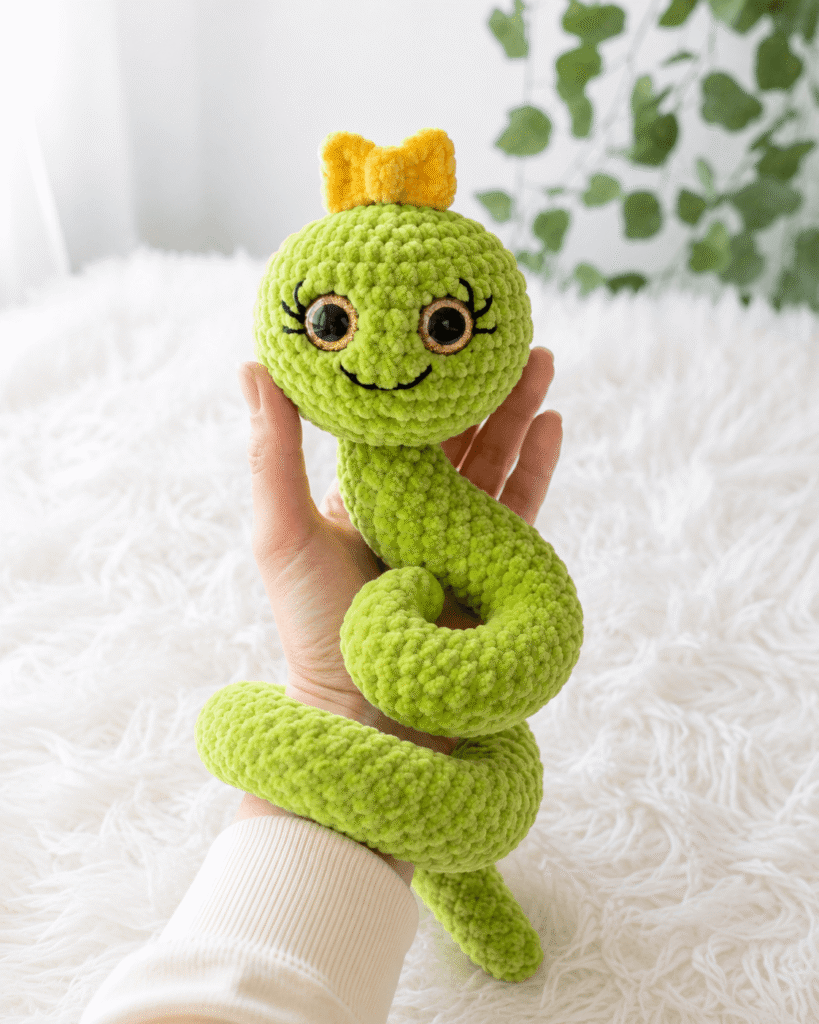
Your Mini Snake Princess is complete. Arrange her in her final pose — the most flattering display position is coiled with her tail curled beneath her, held upright in a cupped hand or placed on a soft surface so she can be seen from the front.
For photography and display, she looks magical held up against a soft light background — just like the inspiration image that brought you here. The Apple Green chenille catches light beautifully, and the gold-rimmed eyes add a sparkle that photographs stunningly.
She makes a perfect gift boxed in tissue paper, a shelf decoration, a baby shower gift for older siblings, or a treasured keepsake for any child who loves animals, fantasy, or handmade toys.
Helpful Tips
- Use a stitch marker religiously. Chenille yarn makes it very hard to see individual stitches because of the pile. A stitch marker at the beginning of every round is not optional with this yarn — it is essential. Move it up at the start of each new round without fail.
- Go slightly tighter than feels natural. With chenille yarn, it is tempting to work loosely because the yarn feels so soft. Resist this. A slightly tighter tension prevents the white fiberfill from peeking through the stitches, which can ruin the look of the finished toy.
- Attach safety eyes before closing the head. Once the head is stuffed and closed, it is nearly impossible to insert safety eyes correctly. Always attach them while the head is still partially open and you can reach inside to press the backing into place.
- Stuff the head firmly, the body lightly. A firmly stuffed head gives the Snake Princess her satisfying round shape. A lightly stuffed body keeps it flexible, poseable, and naturally curling. Over-stuffing the body makes it stiff and unnatural.
- The bow will hold better with a few anchor stitches. When attaching the Sunny Yellow bow crown, run your needle through the head and back through the bow at least 4 to 5 times before knotting. Chenille is slippery and a loosely attached bow will shift or fall off with handling.
Common Mistakes to Avoid
- Losing your place in the round. Chenille pile hides stitch tops. Without a stitch marker and a careful count at the end of each round, you will accidentally increase or decrease without noticing, causing the head to become lopsided or misshapen.
- Skipping the magic ring in favor of a chain ring. A chain ring leaves a small hole in the center of your first round that is very noticeable on a plush toy. Always use a magic ring for amigurumi — it closes the center completely.
- Placing the eyes too far apart or too low. The gold-rimmed eyes should be placed relatively close together and in the upper half of the head for the Princess’s characteristic wide-eyed, cute expression. Eyes placed too far apart or too low will change her personality completely.
- Cutting yarn tails too short. With chenille yarn, you need at least 8 inches of tail to weave in securely. Short tails on chenille will work loose because the slippery polyester fiber does not grip the way wool or cotton does.
- Rushing the bow construction. The bow crown is small but it is the defining detail that makes this a princess rather than a plain snake. Take your time with the shaping and attachment. A messy bow will undermine an otherwise beautiful finished toy.
Final Thoughts
The Mini Snake Princess is one of those crochet projects that stops people in their tracks. She is playful, charming, and surprisingly quick to make — and the chenille yarn makes her look like something from a boutique handmade toy shop the moment she is finished. Whether you are making her as a gift, a shop piece, or simply for the joy of creating something irresistibly cute, this little princess will not disappoint.
Save This Pattern For Later
Did you fall in love with the Mini Snake Princess? Pin this pattern to your Amigurumi Crochet board on Pinterest so you can come back to her whenever you need a fast, adorable project. She also makes the most incredible gift — save this pin and share it with any crocheter in your life who loves cute, whimsical amigurumi. The more handmade snake princesses in the world, the better. Happy crocheting!