Free Crochet Flower Monster Amigurumi Pattern
Introductio
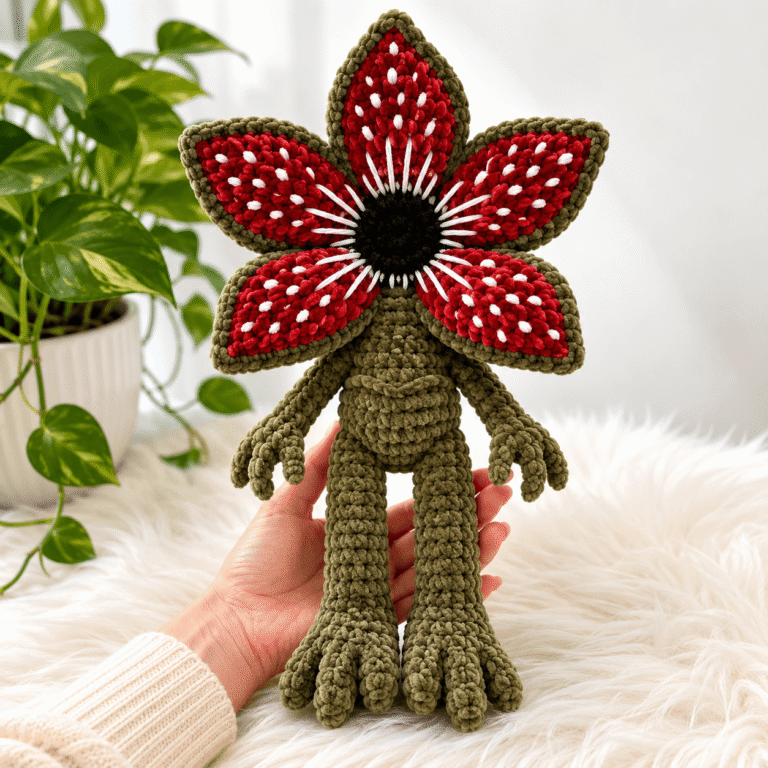
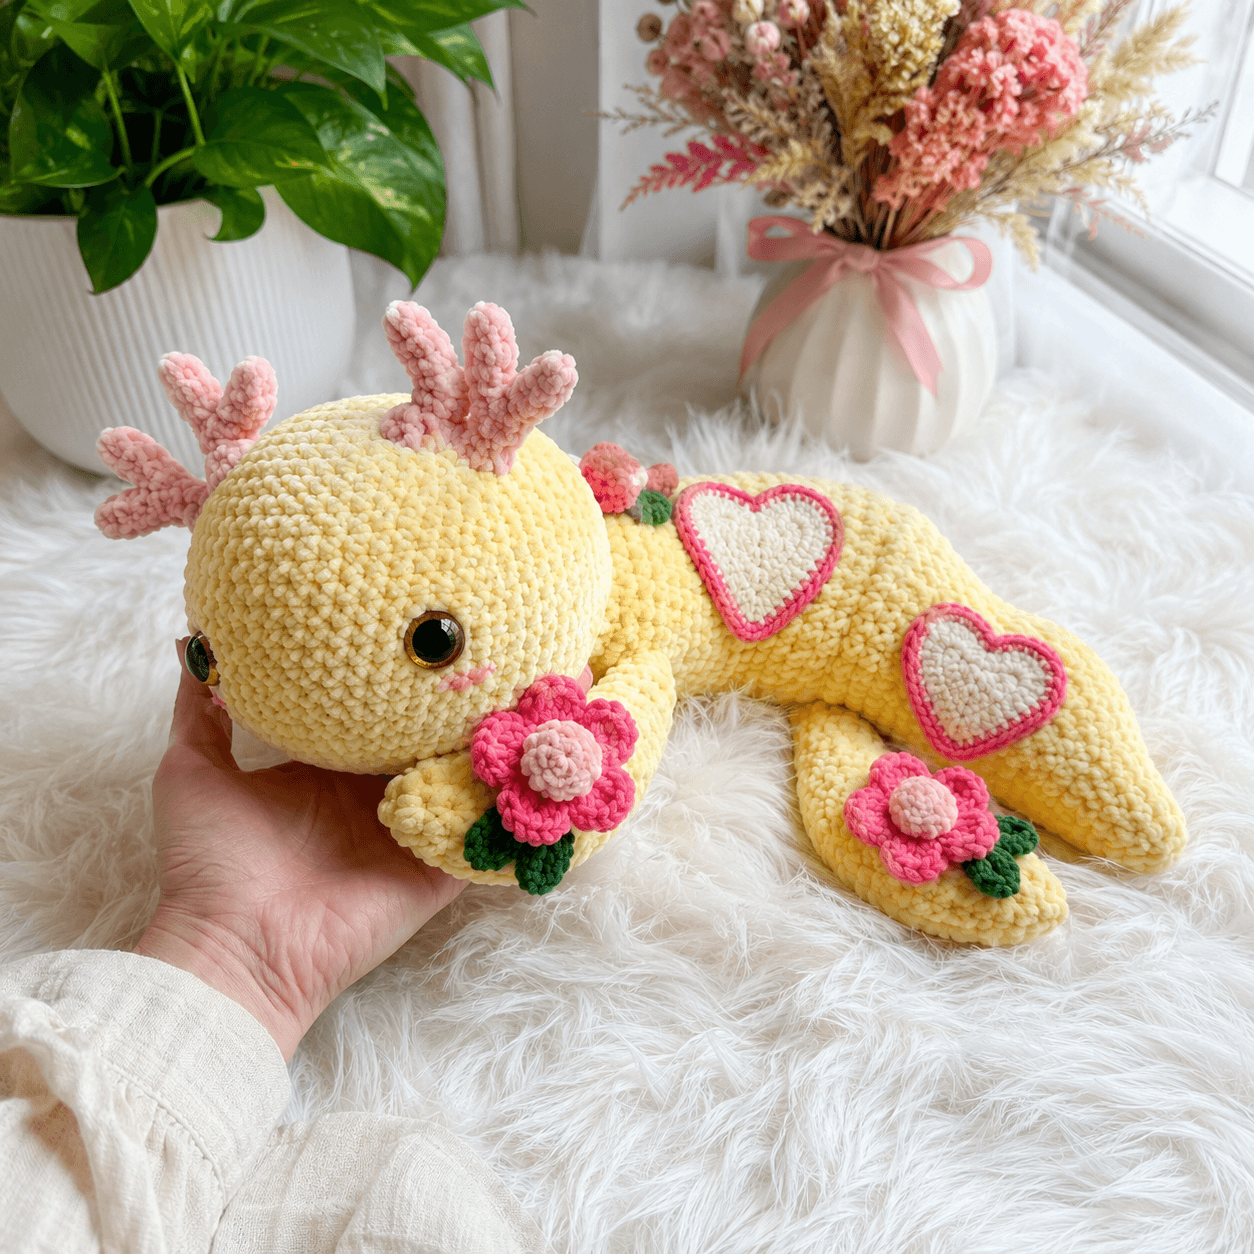
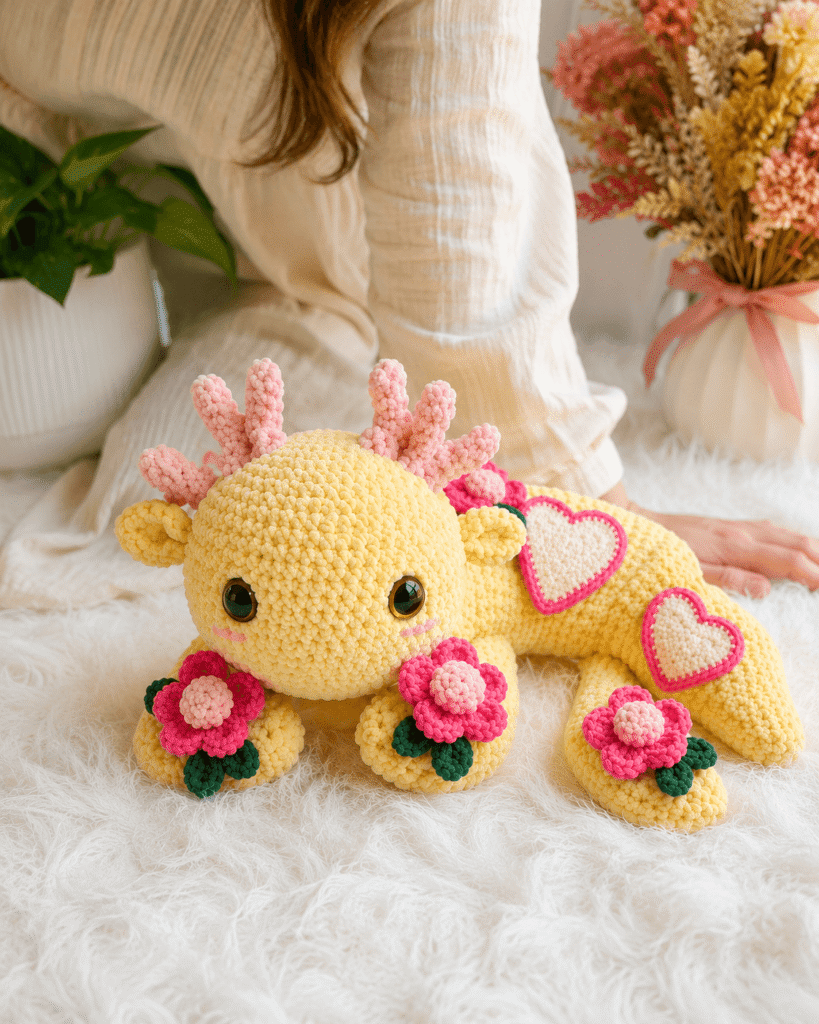
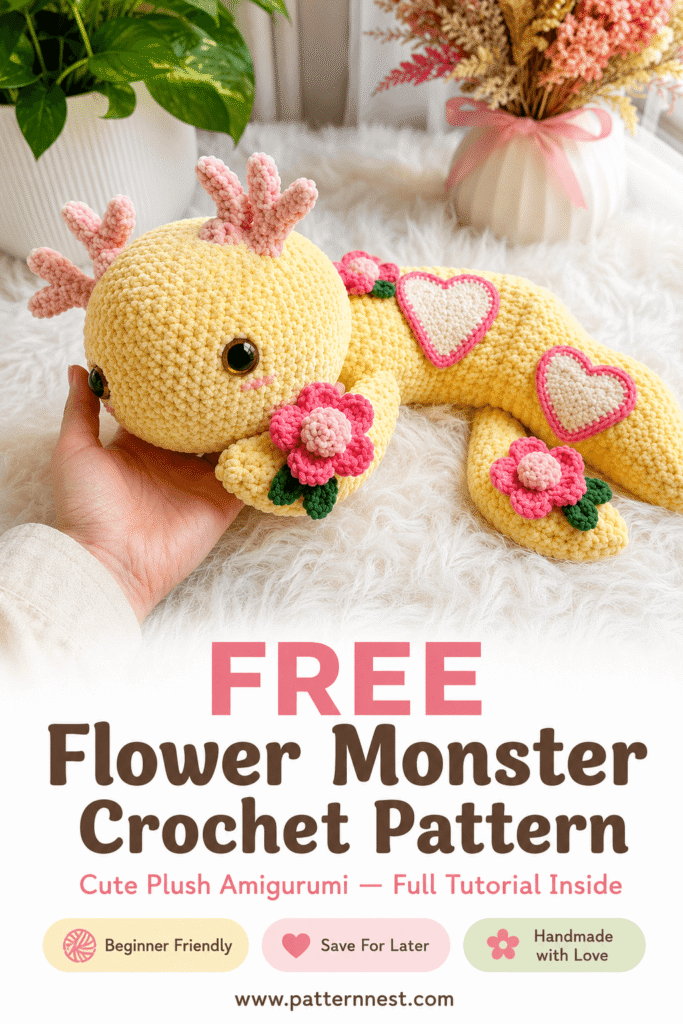
Meet the Flower Monster — the most charming, whimsical, and ridiculously huggable amigurumi you will crochet this season. This free pattern walks you through creating a large, squishy yellow velvet chenille creature with oversized glitter eyes, blush pink antler horns, hot pink and cream heart-shaped back plates, and adorable crocheted daisy flowers blooming from its arms and body.
This project is perfect for anyone who loves kawaii-style plush toys, fantasy creatures, or unique handmade gifts. It is beginner-friendly despite its impressive finished size — the stitches are simple, the construction is logical, and every section builds naturally on the last.
You will work primarily in soft butter yellow velvet chenille yarn, with accent colors in hot pink, blush pink, off-white, and forest green. The result is a 14–16 inch lying-flat flower monster that looks like it belongs in a boutique toy shop — but costs a fraction of the price and is made entirely by your own hands.
Whether you are making this for a Valentine’s Day gift, a spring birthday present, a child’s room decoration, or simply because it is the most joyful crochet project you have ever laid eyes on, this pattern delivers. Let’s dive in.
Frequently Asked Questions
Is this pattern beginner friendly? Yes. The individual stitches — magic ring, single crochet, increases, and decreases — are all basic amigurumi fundamentals. The complexity comes from the number of separate pieces to crochet and assemble rather than any difficult stitch technique. If you have made a simple stuffed animal or amigurumi before, you are ready for this project. Complete beginners who are comfortable with the magic ring and single crochet can absolutely attempt this with patience.
What yarn works best for the Flower Monster? Velvet chenille yarn is essential for achieving the soft, plush, cloud-like texture you see in the photos. Bernat Blanket Extra in a butter or pale yellow colorway is ideal for the body. Lion Brand Velvet yarn is an excellent alternative. For the accent colors — hot pink, blush pink, and off-white — any brand of velvet chenille in those shades will work beautifully. Avoid substituting with regular acrylic or cotton — the velvet pile is what makes this toy look and feel premium.
How long does this project take to complete? Most crafters complete the Flower Monster in 6–9 hours spread across two or three sessions. The long segmented body is the most time-consuming piece. The flowers, heart plates, and horns are quick accent pieces that each take under 20 minutes. Assembly adds another 45–60 minutes. Breaking the project into sessions — body one day, accessories the next, assembly last — makes it feel very manageable.
What size will the finished Flower Monster be? The finished amigurumi measures approximately 14–16 inches long when lying flat in its natural resting pose. It is a large, generous plush — much bigger than a typical small amigurumi — which is part of what makes it such an impressive handmade gift. It is the kind of toy that gets an audible gasp when someone first sees it.
Can I make this in different colors? Absolutely. The Flower Monster pattern works in virtually any main body color — lavender, mint green, dusty rose, soft peach, or powder blue would all look stunning. Simply swap the yellow for your chosen body color and adjust the flower and heart plate colors to complement. A lavender body with white flowers and gold heart plates would create a completely different but equally magical finished toy. The pattern construction remains exactly the same regardless of your color choices.
Materials Needed
Here is everything you need to create the Crochet Flower Monster Amigurumi:
Yarn:
- Velvet chenille yarn in Soft Butter Yellow — approximately 300–350 yards (body, head, limbs, ears, paws — the dominant color throughout)
- Velvet chenille yarn in Hot Pink / Magenta — approximately 40–50 yards (heart plate borders, outer flower petals)
- Velvet chenille yarn in Soft Blush Pink — approximately 40–50 yards (antler horns, inner flower petals)
- Velvet chenille yarn in Off-White / Cream — approximately 30 yards (heart plate centers)
- Velvet chenille yarn in Forest Green — approximately 20 yards (leaf accents on flowers)
Velvet chenille is non-negotiable for this project. Its micro-loop fiber structure creates the signature puffy, velvety texture that makes the Flower Monster look luxurious rather than like a typical crocheted stuffed animal. It photographs beautifully in natural light, which is key for Pinterest and blog content.
Hook:
- 5.0 mm crochet hook (creates the tight, stuffing-hiding fabric essential for clean amigurumi construction with bulky chenille)
Additional Tools:
- Polyester fiberfill stuffing — a generous amount; this is a large toy and requires thorough stuffing throughout
- 18mm black glitter safety eyes with gold-tinted rim — 2 pieces (as seen in the photographs)
- Tapestry needle (for seaming pieces and weaving in ends)
- Stitch markers — at least 4 (essential for tracking rounds in a multi-piece project)
- Scissors
- Straight pins (for positioning all pieces before sewing during assembly)
- Black embroidery floss (for the small nostril details on the snout)
The 5.0 mm hook paired with bulky velvet chenille creates a fabric dense enough to completely conceal the fiberfill stuffing while remaining comfortable to work with across a longer project session.
Skill Level
Level: Beginner-Friendly Intermediate Recommended For: Crocheters comfortable with magic ring, single crochet, increases, and decreases Time Estimate: 6–9 hours total across multiple sessions Finished Dimensions: Approximately 14–16 inches long lying flat; head approximately 4–5 inches wide
This is one of those satisfying intermediate projects where the stitches stay simple throughout but the construction gives you real skills growth — particularly in multi-piece assembly, working with large quantities of velvet chenille, and positioning decorative elements for maximum visual impact.
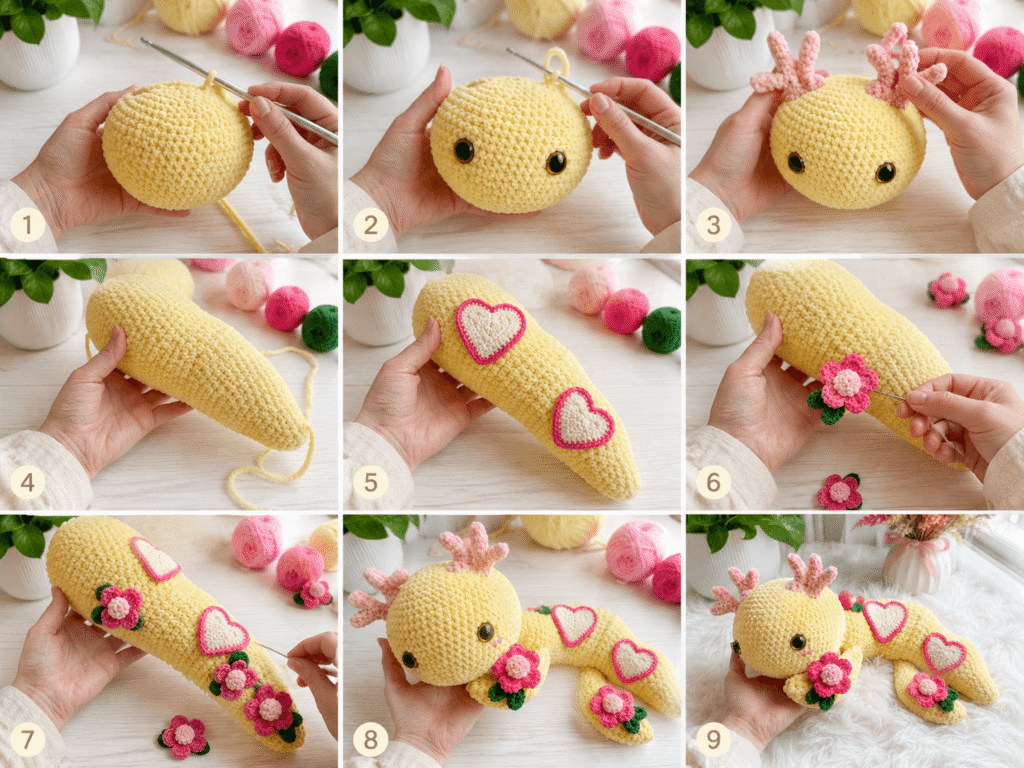
Step-by-Step Tutorial
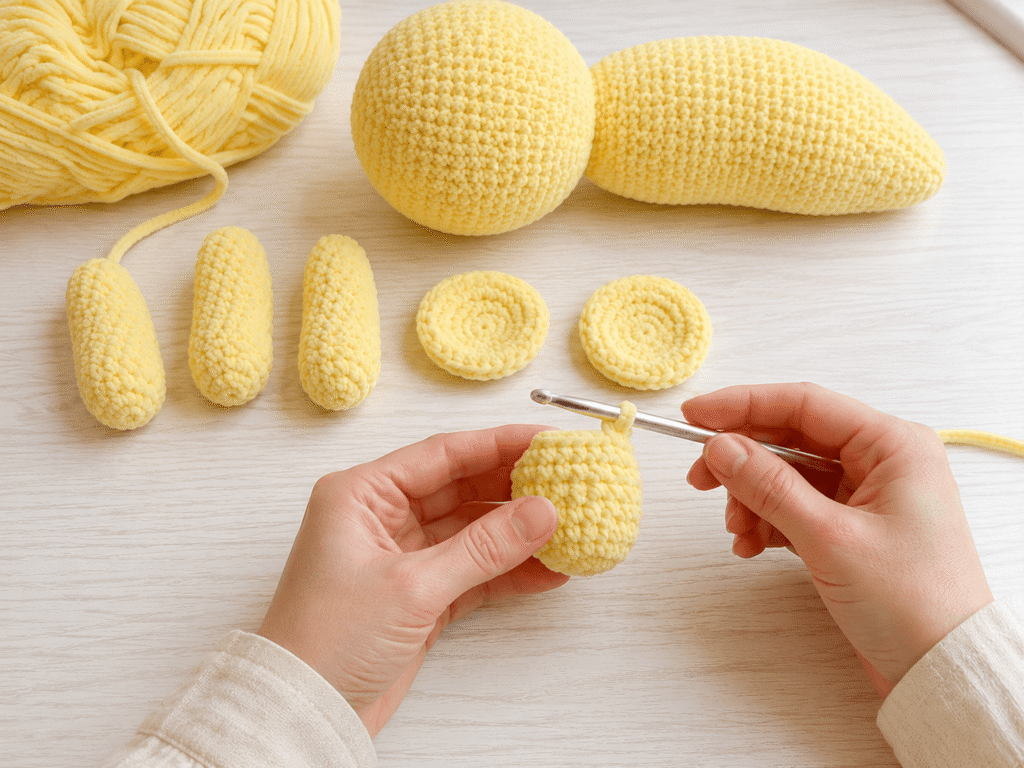
Step 1: Crochet the Body Segments
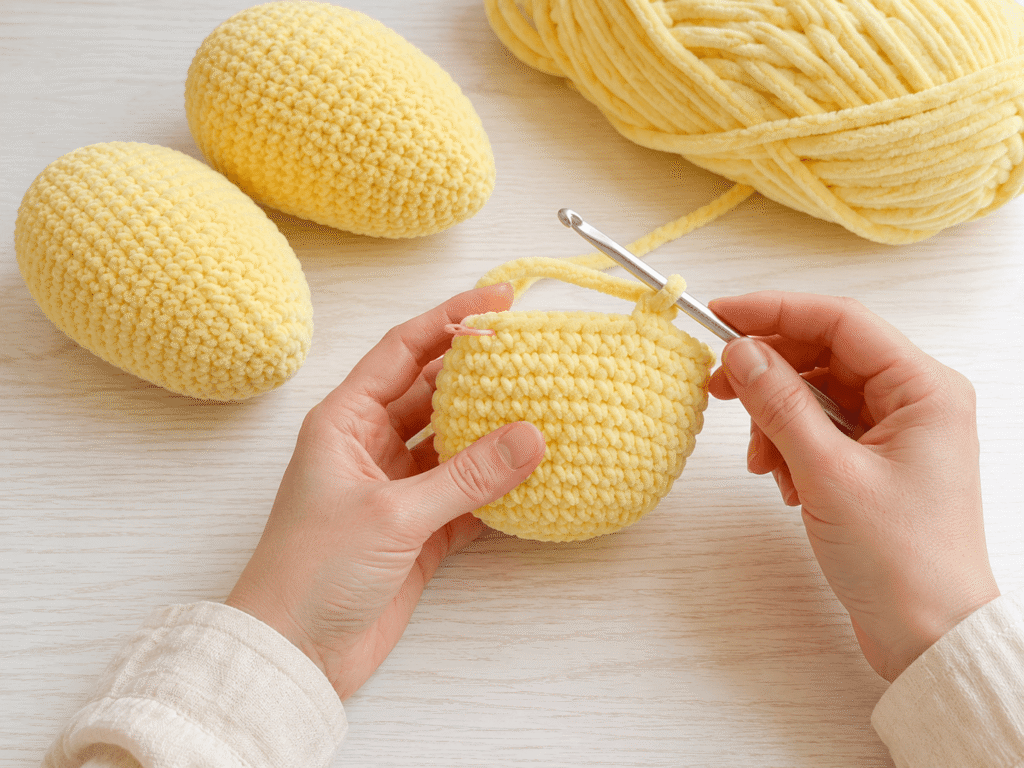
The Flower Monster’s body is made of multiple connected rounded oval segments that give it that distinctive long, caterpillar-like shape. Using your soft butter yellow velvet chenille yarn and 5.0 mm hook, begin each segment with a magic ring.
Work 6 single crochets into the magic ring and pull closed. Increase each round following the standard amigurumi increase pattern until each segment reaches 24–30 stitches. Work 8–10 even rounds with no increases. Begin decreasing to close each segment, stuffing firmly with polyester fiberfill before the opening becomes too small. Fasten off and leave a long yellow yarn tail for joining segments.
Make 3 body segments in total, each slightly larger toward the head end and tapering toward the tail. The largest segment sits closest to the head. All segments are crocheted entirely in soft butter yellow velvet chenille.
Step 2: Crochet the Head
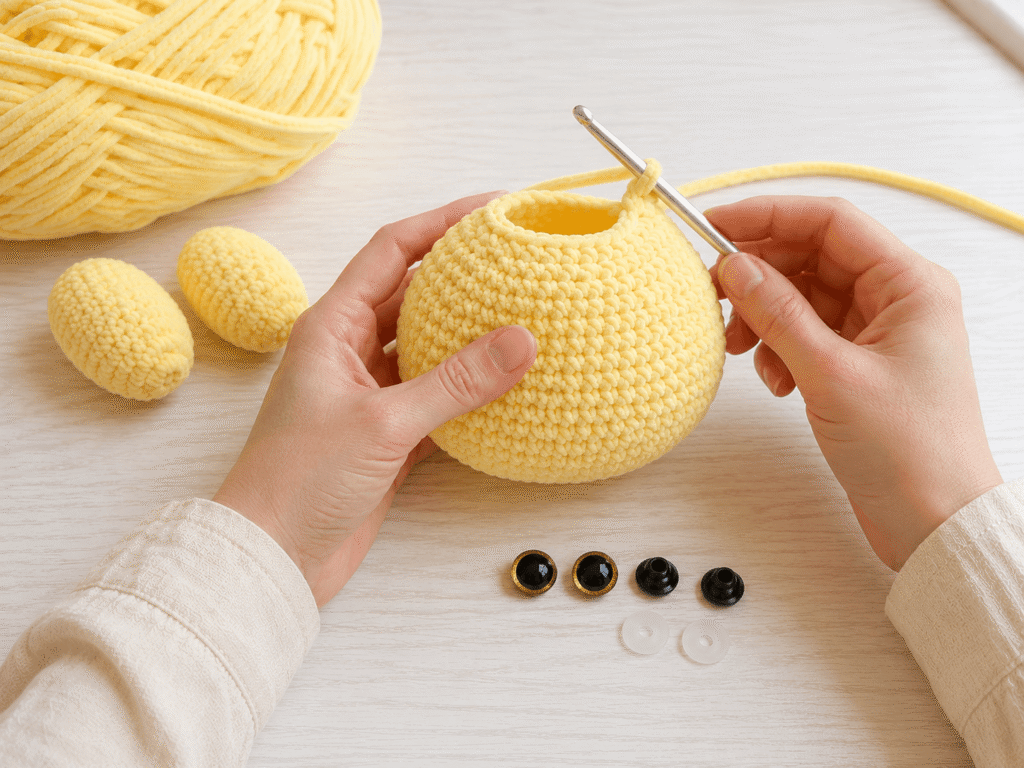
The head is the focal point of the Flower Monster and the piece that gets the most attention — those big glitter eyes make it irresistible. Using soft butter yellow velvet chenille and your 5.0 mm hook, work a magic ring with 6 single crochets.
Increase over multiple rounds until you reach 36–42 stitches, building a wide, slightly flattened oval sphere. The head should be noticeably wider and rounder than the body segments. Work 8–10 even rounds to build depth. Insert your 18mm black glitter safety eyes between rounds 10 and 12, spacing them wide apart for that characteristic kawaii big-eyed look — approximately 10–12 stitches apart. Confirm placement carefully before locking the washers. Stuff firmly and close, leaving a long tail for attachment to the body.
Using black embroidery floss and a tapestry needle, embroider 2 small vertical straight stitches below and between the eyes to create the nose details visible in the photos.
Step 3: Crochet the Limbs, Ears, and Paws
Using soft butter yellow velvet chenille and your 5.0 mm hook, crochet 4 limbs for the Flower Monster. Each arm/leg starts with a magic ring of 6, increases to 12 stitches, then works approximately 12–16 even rounds depending on the desired limb length. The arms are slightly shorter and attach along the upper sides of the body; the legs are positioned lower.
For the two rounded ear pieces, work a magic ring of 6, increase to 18 stitches over 3 rounds, then work 2–3 even rounds. Do not stuff the ears — leave them flat and soft. Sew ears flat onto the sides of the head.
All limbs and ears are worked entirely in soft butter yellow velvet chenille with your 5.0 mm hook, maintaining consistent color throughout.
Step 4: Crochet the Heart Back Plates

The heart-shaped back plates are the most visually dramatic element of the Flower Monster. You will make 2 hearts — one slightly larger than the other. Each heart is made in two layers: an outer hot pink/magenta border and an inner off-white/cream center.
For each heart center: using off-white velvet chenille, work two magic rings of 3 chain stitches, join and increase outward, shaping the classic heart form by working around both lobes. For the border: using hot pink/magenta velvet chenille, work one round of single crochets around the entire outer edge of the cream heart. The result is a two-tone heart with a vivid hot pink border and soft cream center.
Make 2 hearts and leave long tails for attachment. Position hearts on the upper back surface of the assembled body before sewing in place.
Step 5: Crochet the Flowers and Leaves
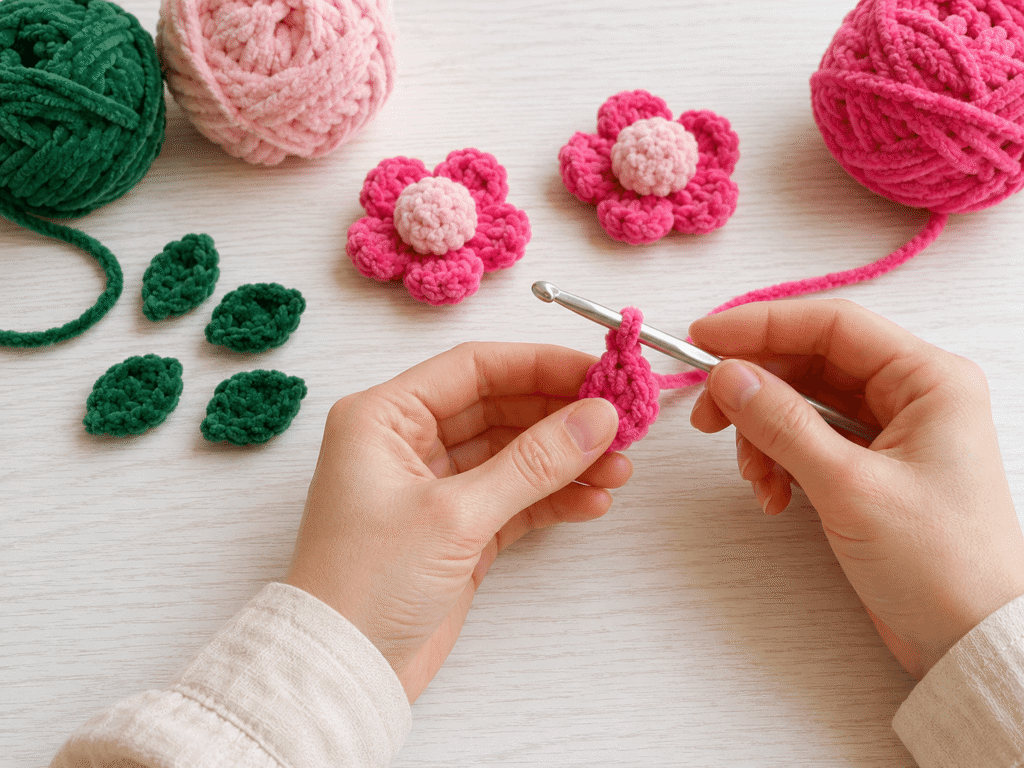
The crocheted daisy flowers are the detail that makes the Flower Monster truly magical. You will make 3 flowers total — two for the arms and one for the body.
For each flower: using hot pink/magenta velvet chenille for the outer petals, work a magic ring of 6. For each petal position, chain 3, slip stitch back into the ring to form a rounded petal. After completing the outer ring, join blush pink velvet chenille and work a small center circle of single crochets on top. The result is a two-layer daisy — hot pink outer petals, soft blush pink raised center.
For the leaf accents: using forest green velvet chenille, work small pointed oval shapes — chain 8, single crochet back along both sides of the chain, gathering at the tip. Make 2 small leaves per flower cluster. The green leaves nestle beneath and around each flower for a realistic botanical detail.
Step 6: Crochet the Antler Horns and Final Assembly
Using soft blush pink velvet chenille and your 5.0 mm hook, crochet the branching antler horns. Work a main horn base — magic ring of 4, increase to 8, work 6 even rounds. Branch off two smaller arm extensions from the main horn using slip stitch joins and working smaller tube rounds off the main shaft. The blush pink antler horns are soft, rounded, and organic-looking — no sharp points. Make 2 antler horns mirror-image of each other.
For final assembly: join all 3 body segments together using your tapestry needle and yellow yarn, sewing them into the long connected creature shape. Attach the head to the front segment. Attach arms and legs to their positions along the body. Pin and sew the 2 heart plates onto the back. Pin and sew flowers with their leaf clusters onto the arms and body. Attach antler horns centered on top of the head, positioned slightly forward. Weave in all ends. Squeeze the finished Flower Monster gently to settle the stuffing evenly. Your Flower Monster is complete and ready to bring joy to whoever receives it.
Helpful Tips
Work the body segments first and join them before attaching the head. Seeing the long body shape assembled helps you correctly position the limbs, heart plates, and flowers with proper visual balance before committing to any sewing.
Press your safety eyes firmly and lock the washer completely. With velvet chenille, the fibers can compress under the washer over time. Give each eye washer a firm press with a flat tool immediately after locking to ensure permanent, secure placement.
When working heart shapes, a light cardboard template cut in the shape of a small heart placed under your chenille as a guide helps keep both hearts symmetrical and matching before you sew them to the back.
Use lots of stitch markers on a multi-piece project like this. With 5 different yarn colors and a dozen separate pieces to track, stitch markers on your working rounds and a simple handwritten checklist of completed pieces will save significant time and prevent mistakes.
Block your flower petals lightly with a damp cloth before assembly. Velvet chenille blooms and fluffs beautifully when gently misted with water and patted flat. This makes the flowers look fuller, more dimensional, and more photogenic once attached to the finished toy.
Common Mistakes to Avoid
Rushing the assembly without pinning first. The visual balance of the Flower Monster depends entirely on symmetrical placement of the heart plates, flowers, and antler horns. Never sew anything directly without first pinning every element in place and stepping back to evaluate the overall composition from multiple angles.
Using thin or non-velvet yarn as a substitute. The dimensional, cloud-like texture of the Flower Monster is produced exclusively by the micro-loop structure of velvet chenille yarn. Regular acrylic or cotton will produce a completely flat, thin fabric that lacks the signature plush quality this design relies on. There is no substitute for velvet chenille in this pattern.
Locking safety eyes too early. Insert eyes only when your head piece has exactly 6–8 stitches remaining open. Any earlier and you cannot confirm the final proportional placement relative to the snout and ear positions. Any later and the opening is too small to lock the washer securely.
Understuffing the body segments. Because each segment is a separate sealed piece, each one must be stuffed firmly and completely before closing. Understuffed segments look flat and deflated, ruining the plump, round silhouette that makes the Flower Monster so appealing. Fill each segment until it holds its round shape firmly under gentle pressure.
Making uneven flowers. The three daisy flowers need to look consistent with each other. Before crocheting all three, make one test flower, examine it for petal consistency, and use it as your size reference for the remaining two. Even small differences in tension between flowers are noticeable when they sit side-by-side on the finished toy.
Final Thoughts
The Crochet Flower Monster is one of those rare patterns that delivers complete creative joy from the first stitch to the very last assembly detail. Every element — the big dreamy eyes, the blush antler horns, the bold heart plates, the blossoming daisy flowers — comes together into a finished toy that genuinely stops people in their tracks.
This is the kind of handmade gift that gets saved in photos, photographed for Pinterest boards, and requested again in every color. Once you make your first Flower Monster, the only question will be what color combination to try next.
Happy crocheting. You are going to love every single stitch of this one.
Save This Pattern for Later
This free Flower Monster pattern is one you will absolutely want to come back to — so save it to your Pinterest crochet board right now before you lose it. Share it with your crafty friends, your crochet group, and anyone who loves handmade plush toys. Every pin and save helps this free pattern reach more crocheters who will love it just as much as you do. Pin it today, make it this week, and share your finished Flower Monster with the whole crochet community — we cannot wait to see yours.