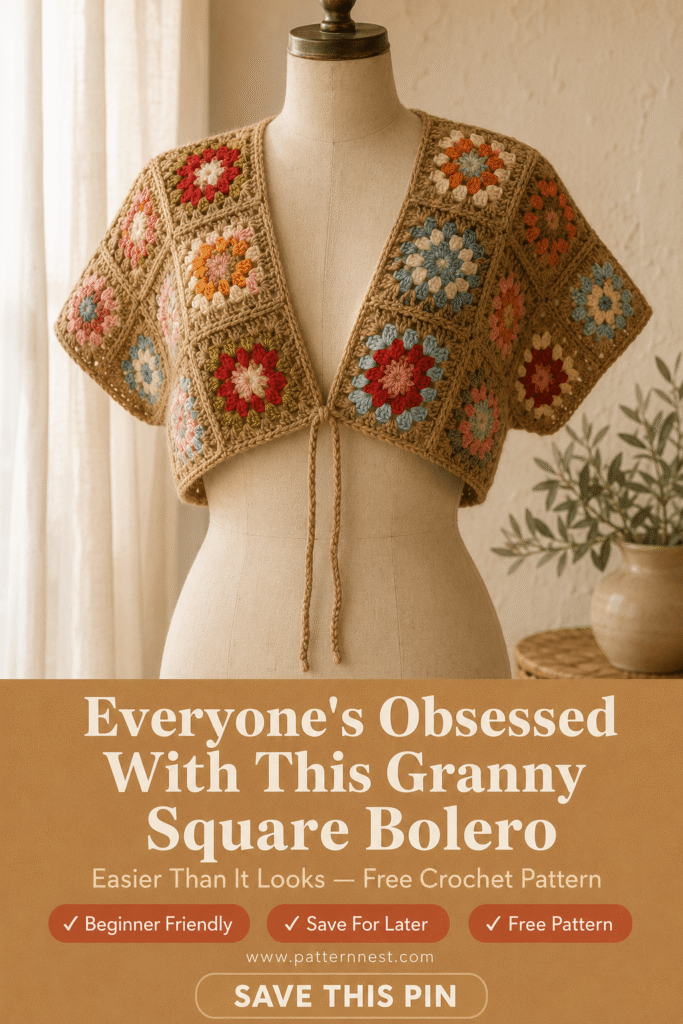
Boho Granny Square Wrap Bolero
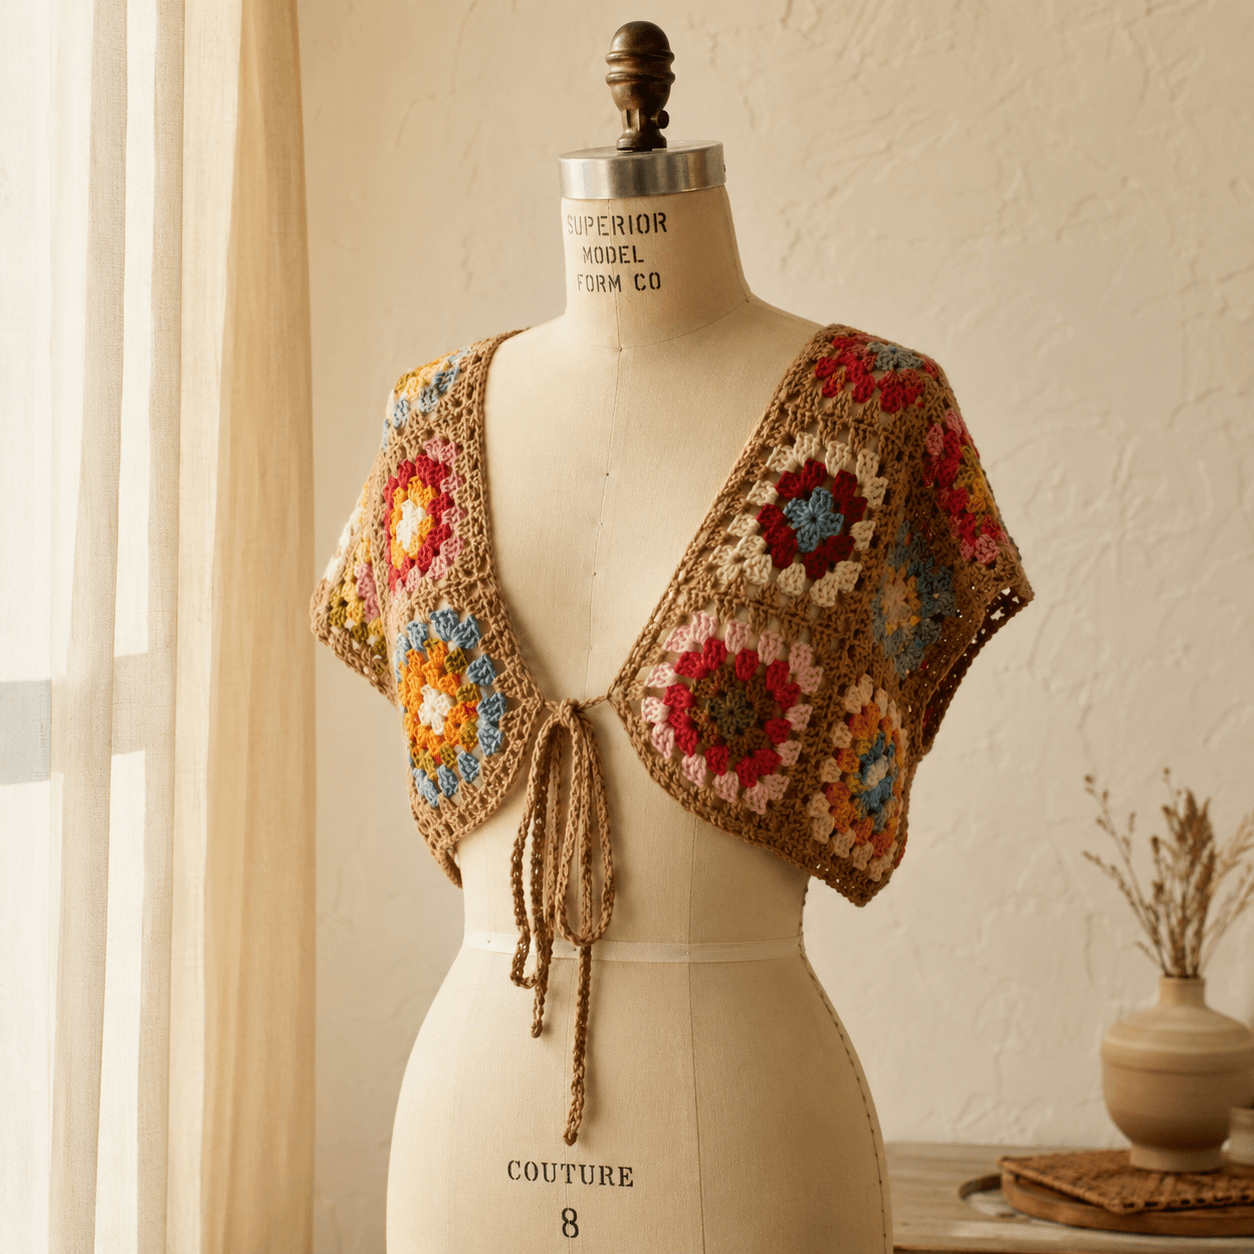
If you’ve been scrolling Pinterest lately, chances are you’ve already fallen in love with this style — and honestly, same. The boho granny square wrap bolero is one of those projects that looks incredibly impressive but is actually made up of simple, classic granny squares joined together into the most beautiful crop top silhouette.
In this tutorial, I’m going to walk you through everything you need to make your own granny square wrap bolero from start to finish. Whether you’re looking for a fun summer festival top, a breezy beach cover-up, or just a gorgeous handmade piece to add to your wardrobe, this one checks every single box.
This project is rated beginner-friendly to intermediate. If you know how to make a basic granny square, you can absolutely make this. The joining and shaping are where a little patience comes in, but nothing here is complicated — I promise.
Finished size: Fits approximately S/M (US women’s sizes 4–12). The pattern is fully adjustable — I’ll explain how to resize below.
Yarn colors used in this pattern: Camel/tan (main color), red, pink, orange, mustard yellow, olive green, sky blue, and cream — a warm, earthy boho palette inspired by the original piece.
Quick Answers
Is this pattern beginner friendly? Yes, with one caveat. If you can make a basic granny square, you can make this bolero. The squares themselves are beginner level. The joining and wrap construction add a small layer of complexity, making it a great “next step” project for beginners who are ready to level up.
What yarn works best for this project? A lightweight worsted or DK weight cotton or cotton-blend yarn works beautifully. Cotton gives the fabric that slightly structured, drapey feel that makes granny square garments look so polished. You want a yarn that holds its shape without being too stiff.
What hook size should I use? A 4.0 mm or 4.5 mm crochet hook works well for DK weight yarn. Go up to a 5.0 mm if you’re using light worsted. Always swatch first — garment fit depends on gauge.
How long does this take to make? Most crafters finish this project in 2–4 weeks of casual crocheting. Making all the individual squares is the most time-consuming part. Once your squares are done, the assembly goes faster than you’d expect.
Can I resize this pattern? Absolutely. The beauty of a granny square garment is that it’s completely modular. Add more squares for a larger size or longer sleeves. Subtract squares for a cropped, smaller fit. I’ll include sizing notes throughout the tutorial.
Do I need to know any special stitches? No special stitches required. You’ll use chain stitch, slip stitch, single crochet, and double crochet — the foundational four. The granny square construction and the join-as-you-go method are the main techniques.
Materials Needed
Yarn:
- DK weight or lightweight worsted cotton or cotton-blend yarn
- Main color: Camel / tan — approximately 200–250 yards
- Accent colors: Red, pink, orange, mustard yellow, olive green, sky blue, and cream — approximately 30–50 yards each
- Total yarn needed: Approximately 500–700 yards depending on your size
Hook:
- 4.5 mm crochet hook (adjust up or down based on your gauge)
Tools:
- Scissors
- Yarn needle (for weaving in ends and seaming)
- Stitch markers
- Measuring tape
- Blocking mat and pins (strongly recommended for garments)
Step-by-Step Tutorial
Step 1: Make Your Granny Squares
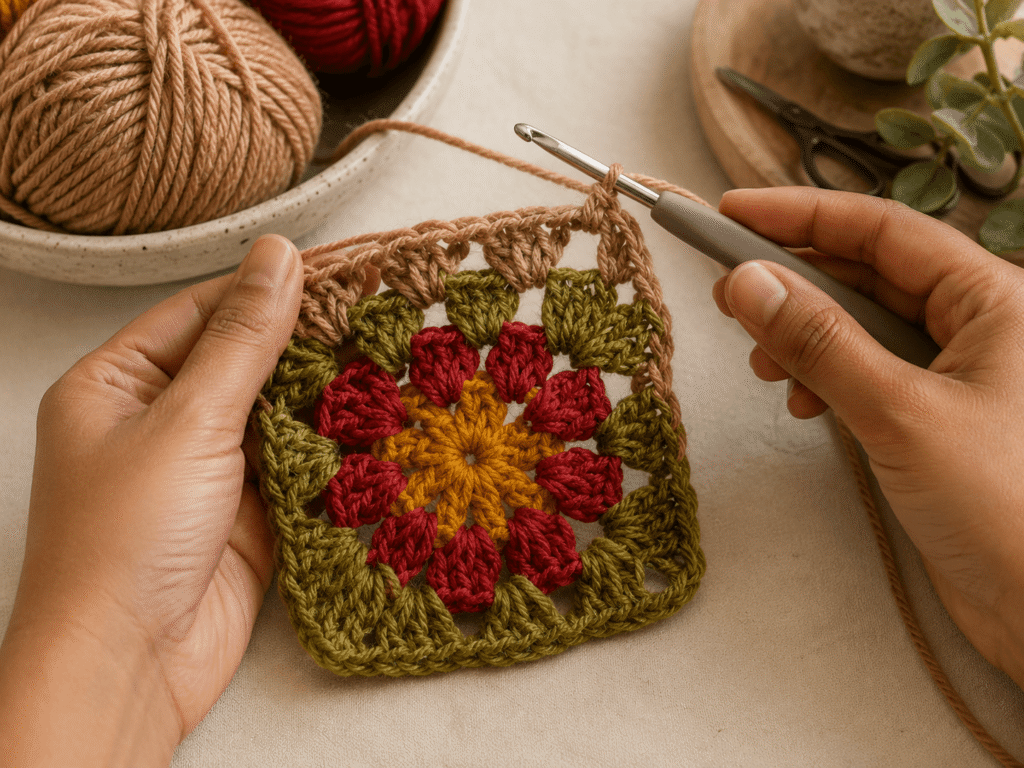
This entire bolero is built from classic 4-round granny squares, so your first job is to make a whole stack of them. For a size S/M bolero with sleeves as shown, you’ll need approximately 40–48 squares. Make more if you want longer sleeves or a larger body.
How to make one granny square:
Start with a magic ring (or chain 4 and join with a slip stitch to form a ring).
Round 1: Chain 3 (counts as first double crochet), work 2 double crochets into the ring, chain 2. Work 3 double crochets into the ring, chain 2 — repeat two more times. Join with a slip stitch to the top of your starting chain 3. You now have 4 clusters of 3 double crochets with chain-2 corner spaces. Fasten off your center color.
Round 2: Join your second color in any corner space. Chain 3, work 2 more double crochets in that same corner space, chain 2, work 3 more double crochets in the same corner (your first full corner is complete). Chain 1. In the next corner space, work 3 double crochets, chain 2, 3 double crochets. Chain 1. Repeat around all 4 corners. Join and fasten off.
Round 3: Join your third color. Work the same pattern — 3 double crochets, chain 2, 3 double crochets in each corner space, and 3 double crochets in each chain-1 side space. Chain 1 between each cluster. Join and fasten off.
Round 4 (border round — use your camel/tan main color): Work the same pattern all the way around, working corner clusters in each corner space and side clusters in each chain-1 space. This round unifies all your squares with the same tan border, which is what makes the finished bolero look so cohesive.
Color tips: Use the accent colors (red, pink, orange, mustard yellow, olive green, sky blue, cream) for Rounds 1–3 in various combinations. Mix them freely — that’s what gives this bolero its signature boho look. The tan border on Round 4 ties everything together so even very different color combinations look intentional.
Common mistake: Forgetting to fasten off between color changes. Always cut your yarn and weave in the end before joining a new color for the cleanest look.
Step 2: Block Your Squares
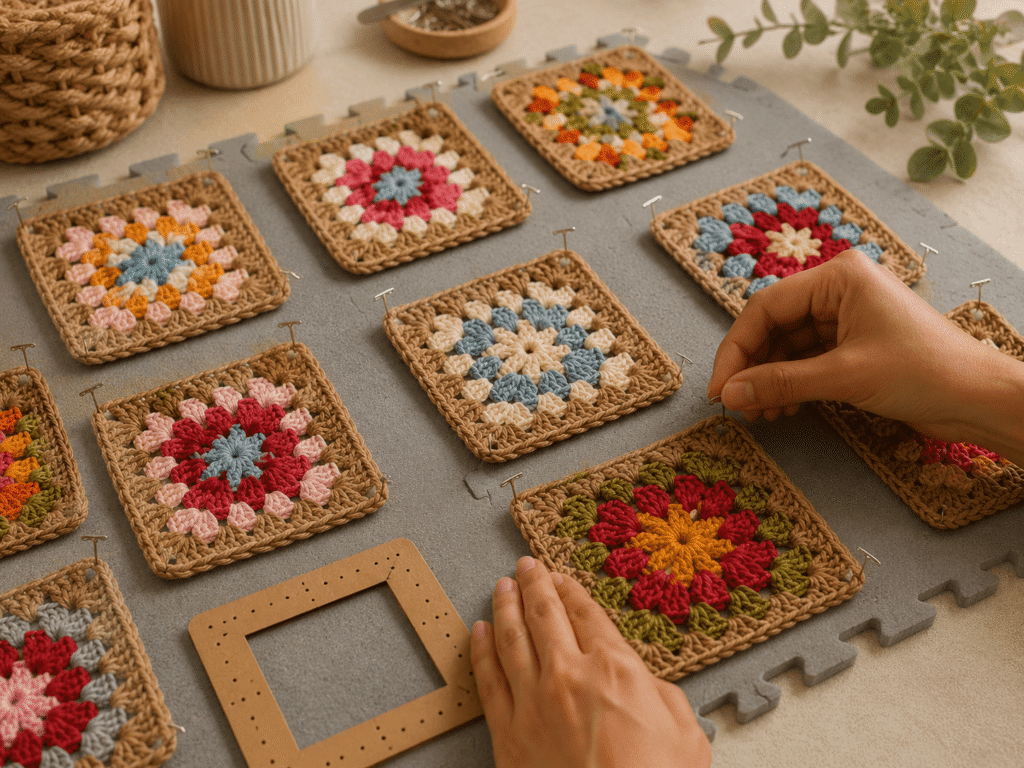
Before you join anything, block every single square. I know — it feels tedious. But blocking is genuinely what takes a granny square project from “handmade” to “did you buy that?” It evens out tension, opens up the stitches, and most importantly makes all your squares the same size, which makes joining infinitely easier.
Wet block your squares by soaking them in cool water for 10–15 minutes, gently squeezing out excess water (don’t wring), then pinning them flat on your blocking mat to the same dimensions. A 5-inch square is a good target size. Let them dry completely before unpinning — usually overnight.
Pro tip: Make a blocking template out of cardboard cut to 5 x 5 inches. Pin each square to match the template every time for perfectly uniform results.
Step 3: Plan Your Layout
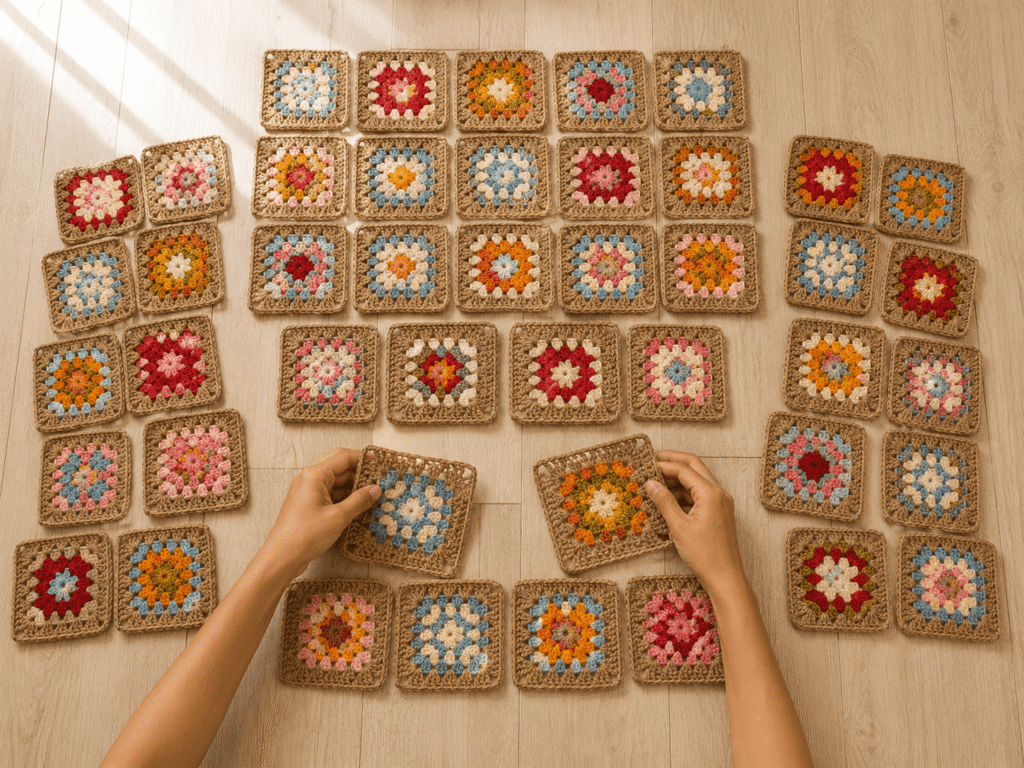
Before you join anything, lay your squares out flat on a large surface — the floor works great — and plan your layout. This is the step most beginners skip and then regret later.
The bolero consists of three main panels:
- Back body panel: A rectangle of squares forming the back of the top, typically 4 squares wide by 3 squares tall for S/M.
- Front wrap panels: Two narrower panels that wrap around to the front and tie at the waist. Each is approximately 2 squares wide by 3 squares tall.
- Sleeves: Two tubes of squares forming the sleeves, each approximately 3 squares wide joined into a tube, by 4–5 squares long.
Arrange your squares by color so similar shades are spread out evenly across the layout. Take a photo once you’re happy with the arrangement — you’ll thank yourself later when you’re mid-joining and lose track of which square goes where.
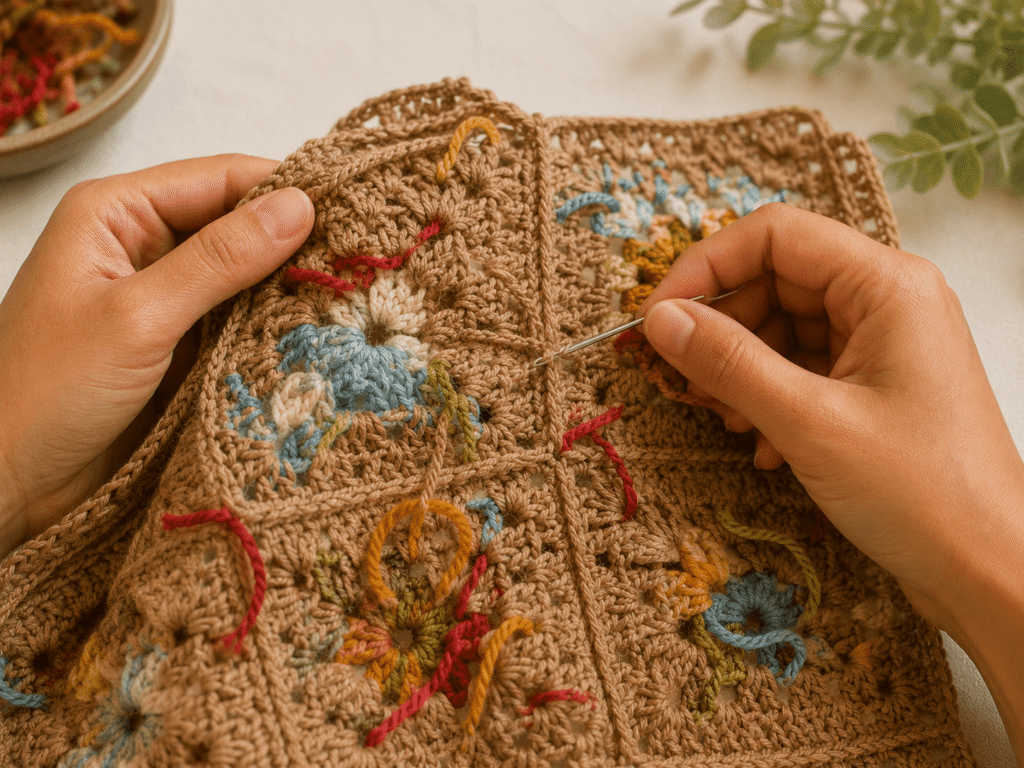
Step 4: Join Your Squares
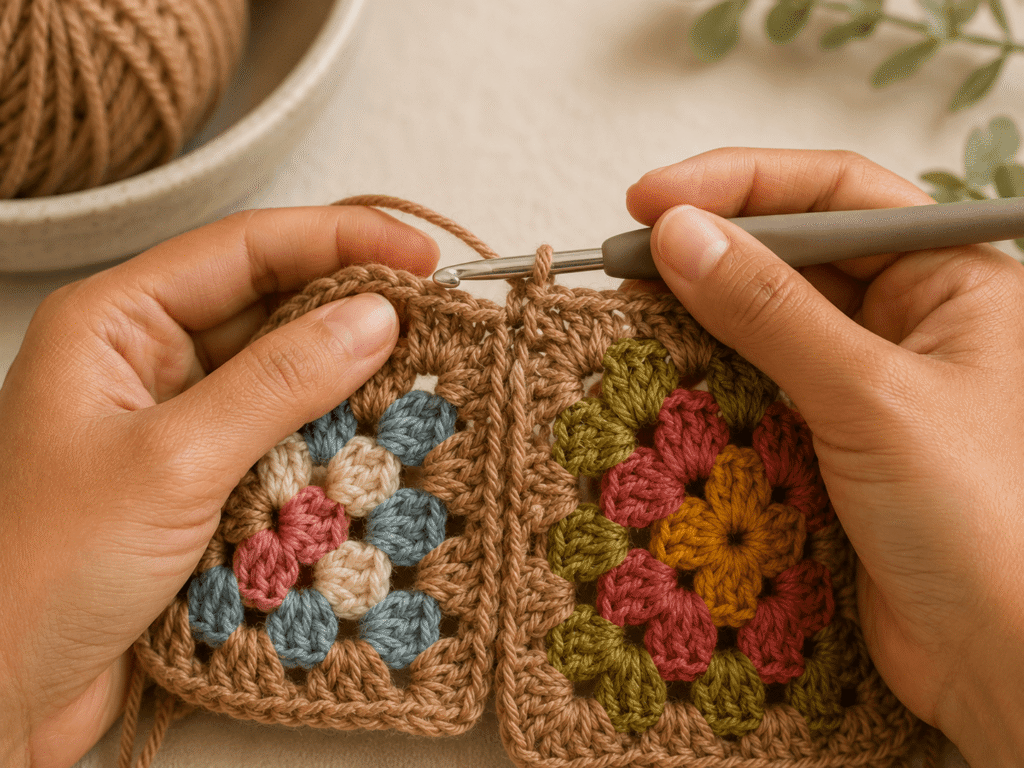
Now for the assembly. There are two popular methods for joining granny squares — whip stitch seaming and join-as-you-go. Either works beautifully here. I personally prefer the flat slip stitch join for garments because it creates a flat, flexible seam that drapes well.
Flat slip stitch join:
Hold two squares with wrong sides facing each other. Using your camel/tan main color and hook, insert your hook through the back loops only of both squares simultaneously and slip stitch across. Work one slip stitch per stitch all the way along the edge. At corners, work a slip stitch into the corner chain space of both squares.
Join your squares in rows first (horizontal joins), then join the rows together (vertical joins). Work systematically — it prevents mistakes.
For the sleeves: Once you have your sleeve rectangles assembled, join the short edges together to form a tube. This creates the sleeve shape.
Common mistake: Joining squares with the wrong sides facing outward. Always double check before you start a seam — it’s much easier to catch before you’re halfway through than to undo slip stitch seaming.
Step 5: Assemble the Bolero
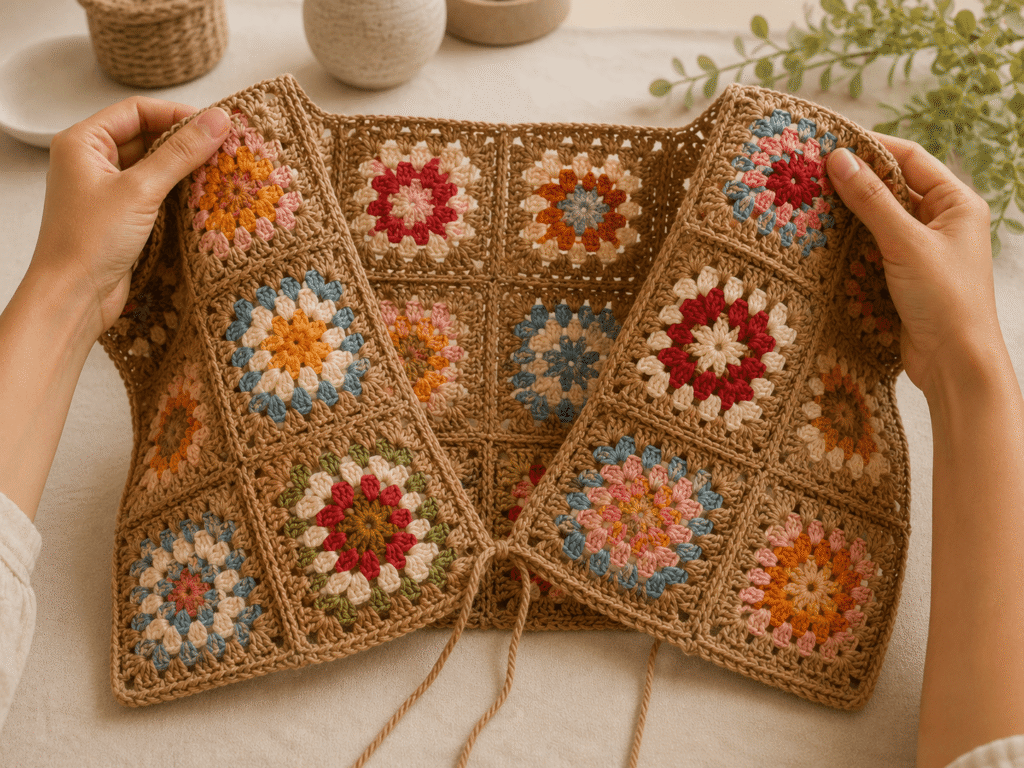
Once all your panels are joined, it’s time to put the whole bolero together.
Lay your back panel flat. Attach one front wrap panel to each side edge of the back panel using the same slip stitch join method. The front panels will angle forward and form the V-neckline naturally when worn.
Next, attach the sleeves. Align the top edge of each sleeve tube with the shoulder area on each side of the back panel (and the outer edge of the front panels). Join using slip stitch seaming. The sleeve should hang naturally from the shoulder seam.
Sizing note: If you want a longer, more dramatic sleeve, simply add more squares to your sleeve tubes before attaching. If you want a cropped sleeve (more of a bolero shrug), use fewer squares.
Step 6: Add the Wrap Ties
The wrap ties are what give this bolero its signature silhouette — that beautiful, tied waist look you see in the photo.
Using your camel/tan main color, make two long crochet chains of approximately 60–80 chains each (or longer if you prefer a bigger bow). Attach one chain to the bottom inner corner of each front wrap panel. These ties cross at the front and tie at the back, or cross at the back and tie at the front — both work, play around with what you prefer.
For a more polished look, work a row of single crochets back along the chain to create a slightly thicker, more substantial tie cord.
Pro tip: Before cutting your tie length, try the bolero on (or have someone hold it up to you) and test the tie length with a length of scrap yarn. It’s much easier to adjust before you’ve made the finished ties.
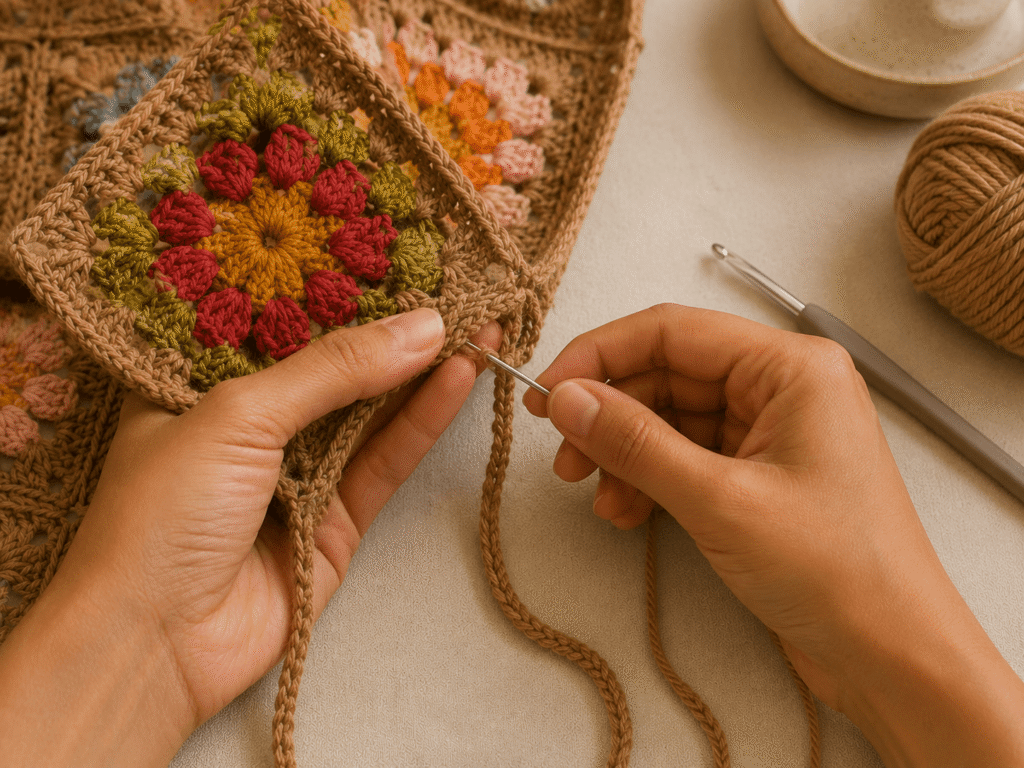
Step 7: Finishing — Border and Weaving In Ends
Work one round of single crochet in your camel/tan main color all around the outer edges of the bolero — the neckline, the front wrap edges, and the bottom edge. This cleans up any uneven edges and gives the whole piece a polished, finished look.
Weave in every single end. Yes, there will be a lot of them — granny square projects always have many ends because of all the color changes. Take your time with this step. Use your yarn needle to weave each end in at least 2–3 different directions so they don’t work their way out over time.
Give the finished bolero a final light blocking or steaming to even out the seams and help everything lay beautifully flat.
Pro Tips
Consistent tension is everything in garments. If your tension varies from square to square, the finished bolero will have visible size differences between squares that are difficult to fix after joining. If you notice your tension changing, take a break — tired hands get tighter. Blocking helps a lot, but consistent tension helps more.
Make more squares than you think you need. Always crochet 4–6 extra squares before you start joining. Having extras gives you flexibility to swap out a square that doesn’t quite fit the color layout, or to add length if the garment turns out shorter than expected.
Use stitch markers to keep track of your rows during joining. When you’re assembling panels of 12, 15, or 20 squares, it’s surprisingly easy to lose your place. Place a stitch marker at the end of each completed row of joining.
Weave in ends as you go. Instead of saving all your ends for the very end (and facing a mountain of loose tails), weave in each end before starting the next square. It makes the final finishing far less daunting.
Test your colors before committing. Lay a few squares next to each other before crocheting them all. Colors that look gorgeous separately don’t always look great together. The boho palette works best when warm and cool tones are balanced — try not to cluster all the blues in one area or all the reds in another.
Common Mistakes to Avoid
Skipping the gauge swatch. For scarves and blankets, gauge barely matters. For a garment, it matters enormously. Even a half-stitch difference per inch can translate to several inches of size difference across the whole bolero. Always swatch, wash your swatch, and measure before you commit to making 40+ squares.
Not blocking before joining. Unblocked squares are often slightly different sizes due to tension variations. When you join uneven squares, the seams pucker and the whole garment looks uneven. Block first, always.
Joining in the wrong direction. It’s easy to accidentally flip a square when picking it up to join. Before every seam, orient the square carefully so the right side is facing the correct direction.
Making the sleeves too long before trying on. Sleeve length is very personal and very hard to predict from a pattern alone. Assemble the body of the bolero first, try it on, then determine how long you want the sleeves before committing to that length.
Using the wrong yarn weight. A bulky yarn will make this bolero stiff and heavy rather than drapey and boho. Stick to DK or light worsted cotton. The drape is part of what makes this garment so beautiful.
Final Thoughts
There’s something really special about wearing something you made with your own hands — and this boho granny square bolero is one of those projects that gets compliments every single time you wear it. It looks intricate and artsy, but every stitch is something you already know how to do.
Take it one square at a time. Don’t rush the blocking. Enjoy the process of watching all those colorful little squares transform into a wearable, beautiful piece of art. You’ve got this — and the finished project is absolutely worth every stitch.
Save This for Later!
Love this pattern? Save this Pin to your Crochet Board so you can find it later — and share it with a friend who’s been wanting to try their first crochet garment!