Crochet Classic Granny Stitch Boho Bandana
The Coziest Crochet Bandana for Autumn — Granny Stitch Colorwork Head Scarf
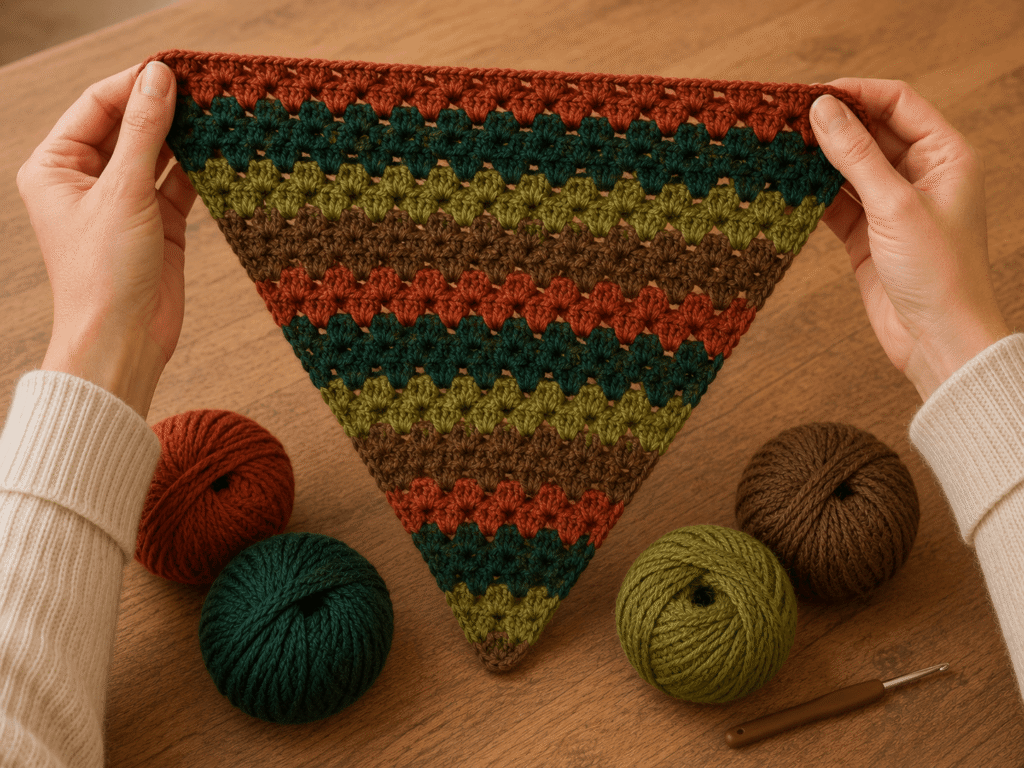
If you have ever made a granny square, you already know how to make this bandana. The Classic Granny Stitch Boho Bandana takes the most beloved stitch in all of crochet — the iconic (3dc, ch1) granny cluster — and turns it into a richly colored, perfectly wearable triangular head scarf that captures every warm, earthy, cottagecore feeling of autumn in a single accessory.
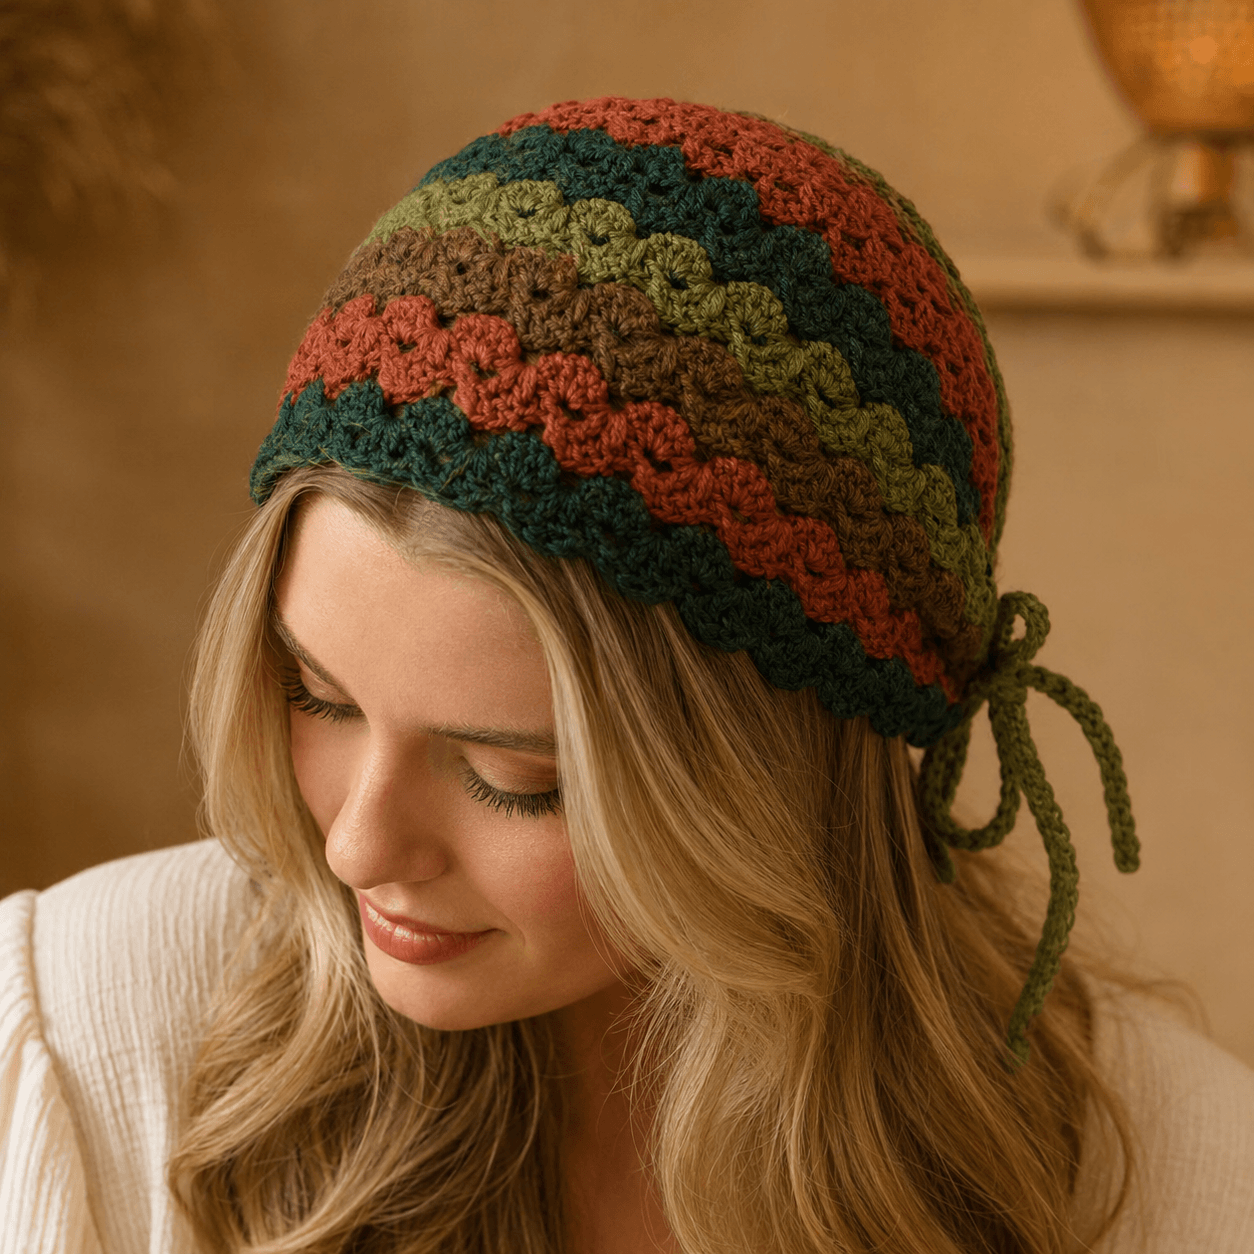
The color combination is what makes this piece genuinely stunning: Terracotta Rust Red, Forest Green, Olive Sage Green, and Warm Brown Mocha rotate in single-row stripes across the entire bandana body, creating a rhythm of warm and cool, earthy and fresh that feels almost like a woodland landscape woven into fabric. Add a simple Olive Green chain tie bow at the side, and the result is a bandana that looks like it belongs on a vintage market stall in the French countryside.
This is a true beginner pattern — if you can chain, double crochet, and change yarn colors, you have every skill this project requires. The granny stitch is completely forgiving, works up quickly, and is one of those stitches that feels instantly comfortable even on the first row.
Make it for yourself. Make it as the most beautiful autumn gift. Make it because crochet is at its best when it is warm, colorful, and wearable.
Frequently Asked Questions
Is this granny stitch bandana pattern beginner friendly?
Yes — wholeheartedly. The granny stitch is one of the first stitches most crocheters ever learn, and for good reason: it is fast, forgiving, and produces a beautiful fabric with very simple technique. The only skill beyond basic double crochet is the color change, which is equally straightforward — you simply drop one color and pick up the next at the end of each row. If you have made even one granny square or worked any double crochet project before, you will fly through this bandana pattern.
What yarn works best for this colorwork bandana?
A worsted weight wool or wool-acrylic blend is ideal. Wool has a natural warmth and slight texture that makes the granny stitch clusters look rustic and beautiful — slightly dimensional and alive in a way that smooth acrylic cannot quite replicate. The slight elasticity of wool also makes color changes cleaner and neater. Lion Brand Fishermen’s Wool, Cascade 220, Paintbox Simply Aran, or Drops Alaska in the four autumn colorway shades are all excellent choices. If you prefer machine washable, a superwash wool blend gives you the look and feel of wool with easy care.
How long does this bandana take to crochet?
This is one of the faster projects in a crochet accessories collection — most beginners complete it in 5 to 7 hours. The granny stitch works up quickly because each row covers significant width with relatively few individual stitch insertions. The four-color rotation adds minimal time — color changes in granny stitch rows take only seconds per change. Plan for a comfortable Saturday project or two evening sessions.
How do I keep the color changes neat?
The key to clean color stripes in this pattern is consistency at the color change point. Always change to the new color on the final yarn-over of the last stitch of the current row — pull the new color through as the completing yarn-over rather than finishing the stitch in the old color and then attaching the new one. This creates a clean, seamless color transition at the row edge. Cut the old color with each change, leaving a 6-inch tail, and weave in ends as you go rather than saving them all for the end.
Can I use a different color palette?
Absolutely. The Terracotta, Forest Green, Olive, and Mocha palette is the perfect autumn combination, but this same pattern works beautifully in a spring palette (blush pink, sage green, lavender, cream), a coastal palette (navy, sky blue, sandy beige, white), or a monochromatic palette using four tonal shades of a single color family. The granny stitch structure and the 4-color rotating stripe work with any color combination — the construction never changes.
Materials Needed
The following materials will give you the richest, most beautiful autumn version of this bandana.
Yarn — all worsted weight wool or wool-acrylic blend:
- Color 1 (C1) — Terracotta / Rust Red: approximately 60–70 yards
- Color 2 (C2) — Forest Green / Deep Teal Green: approximately 55–65 yards
- Color 3 (C3) — Olive / Sage Green: approximately 60–70 yards (slightly more — also used for the chain ties)
- Color 4 (C4) — Warm Brown / Mocha: approximately 50–60 yards
This is a perfect stash-busting project — you need small amounts of each color, making it ideal for using up worsted weight leftovers from previous projects.
Tools and Notions:
- 5.0 mm (H/8) crochet hook
- Scissors — one per color if possible, to avoid constantly re-threading when cutting color tails
- Tapestry needle — for weaving in all color-change ends (there will be several)
- Stitch markers — to mark both end stitches for the decrease rows and to track your color sequence
- Measuring tape — to check dimensions as the triangle grows
Why wool or wool blend? The slight halo and natural texture of wool gives the granny stitch clusters a warm, rustic depth that is integral to the cottagecore aesthetic of this bandana. The four earthy colors look richer and more dimensional in wool than in smooth acrylic. For a wearable autumn accessory meant to feel cozy and handmade, wool is the right choice.
Skill Level
Skill Level: Beginner Stitches Used: Chain (ch), Slip stitch (sl st), Double Crochet (dc), Granny stitch cluster (3 dc, ch 1), Color change technique Estimated Time: 5–7 hours Finished Dimensions: Approximately 22 inches wide × 13 inches deep at center point; chain ties approximately 10–12 inches long
Step-by-Step Tutorial
Step 1: Understand the Granny Stitch and Set Up Your Foundation
The granny stitch used in this bandana is the same stitch that builds classic granny squares — a cluster of 3 double crochet stitches worked into a chain space, followed by a chain-1 space, repeated across. Worked in rows rather than rounds, it creates a beautifully textured horizontal fabric.
Color sequence for this bandana: Row 1: Terracotta (C1) Row 2: Forest Green (C2) Row 3: Olive Sage Green (C3) Row 4: Warm Brown (C4) Row 5: Terracotta (C1) again …and so on, rotating through all 4 colors throughout.
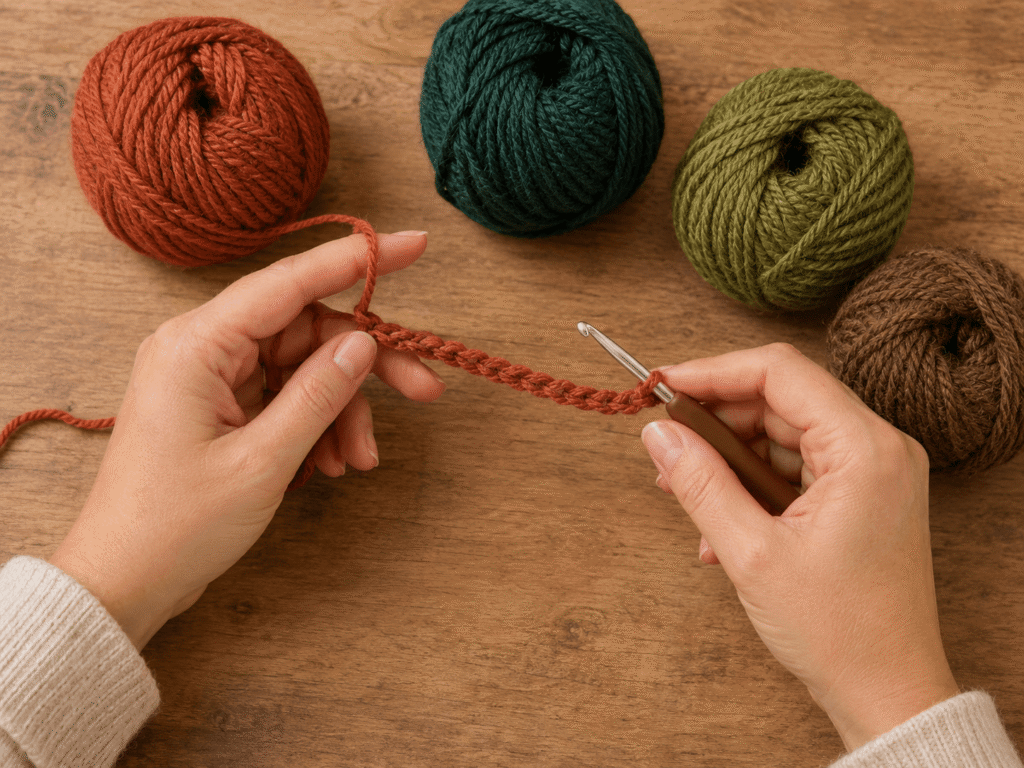
Foundation chain: Using Terracotta (C1) yarn and your 5.0 mm hook, chain 109. (Or any multiple of 3 + 1 for your desired width.)
Foundation Row (C1 — Terracotta): Dc in 4th chain from hook (skipped chains count as first dc). *Ch 1, skip 2 ch, 3 dc in next ch* repeat across to last 3 chains. Ch 1, skip 2, dc in last chain. Chain 3, turn. (This creates the foundation row of granny stitch clusters.)
You now have a full row of granny stitch clusters in Terracotta — the warm brick red of the first color stripe is already established.
Step 2: Work the Granny Stitch Rows in Color Sequence

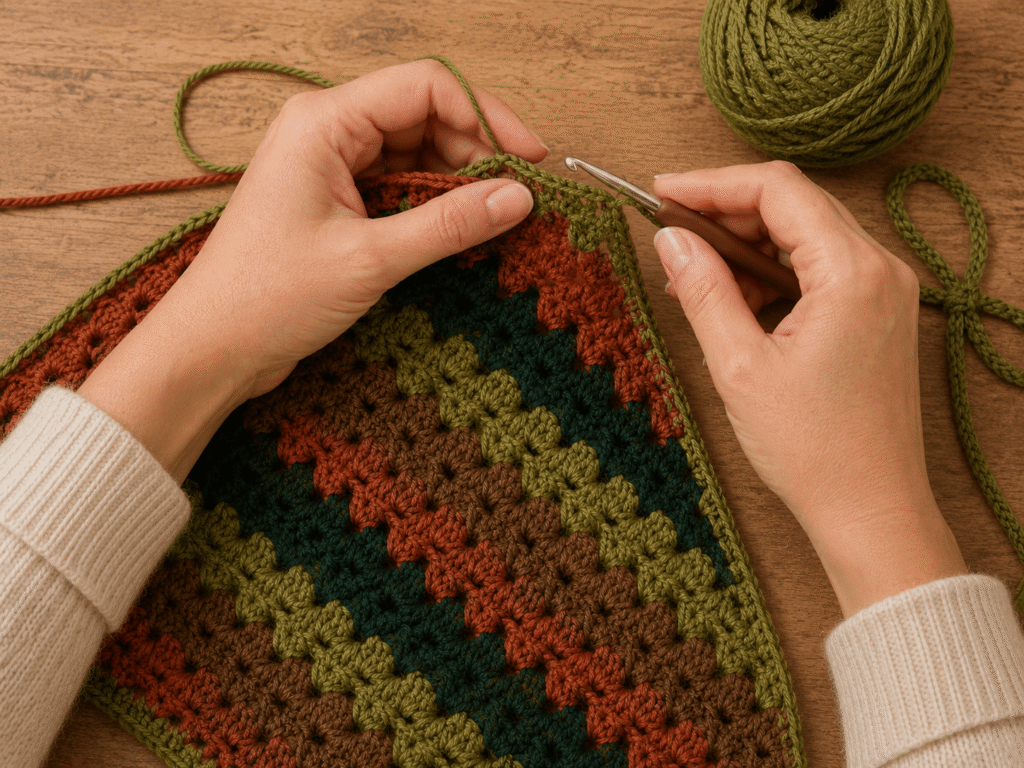
Each row of the bandana body follows the same granny stitch structure, with a color change at the beginning of every new row.
Standard granny stitch row: Chain 3, turn (counts as first dc). *3 dc into each ch-1 space across, ch 1 between each cluster* repeat. End with dc into the turning chain space. Chain 3, turn.
Color change technique: At the end of each row, on the final yarn-over of the last stitch, drop the current color and pull the new color through to complete the stitch. Cut the old color leaving a 6-inch tail. Continue with the new color for the chain-3 turning chain and the entire next row.
Rows 2–5: Work one row each in Forest Green (C2), Olive Sage Green (C3), Warm Brown (C4), and back to Terracotta (C1) — completing the first full 4-color rotation. The autumn color stripe rhythm is immediately beautiful and deeply satisfying to watch develop.
Continue the 4-color rotation until your bandana measures approximately 11 to 12 inches deep at the center — working without any decreases for the first section to establish the full-width body.
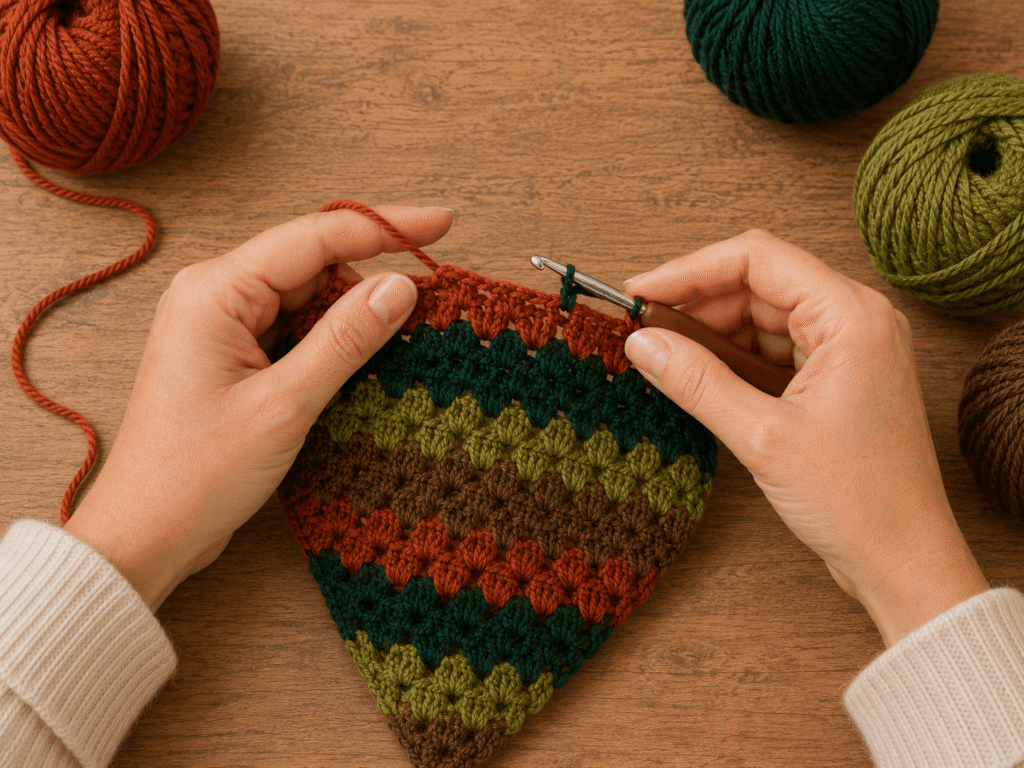
Step 3: Begin Triangle Shaping with Gradual Decreases
Once the bandana body is approximately 4 to 5 inches deep, begin the gradual end decreases that create the triangular bandana shape.
Decrease method: At the beginning of each row, after the turning chain, slip stitch across the first cluster (3 dc + ch 1) and into the second ch-1 space before beginning the granny stitch pattern. At the end of the same row, stop after the second-to-last cluster and turn — leaving the final cluster unworked.
This removes one full granny cluster from each end per row, creating the angled edges of the bandana triangle. Continue the 4-color rotation throughout the decreasing rows — the color stripes continue beautifully regardless of the narrowing width.
Continue decreasing until you have reduced to 3 to 5 clusters across the row. On the final row, work a single 3-dc cluster into the center ch-1 space and fasten off. Your bandana triangle is complete.
Step 4: Work a Tidy Border Along the Side Edges
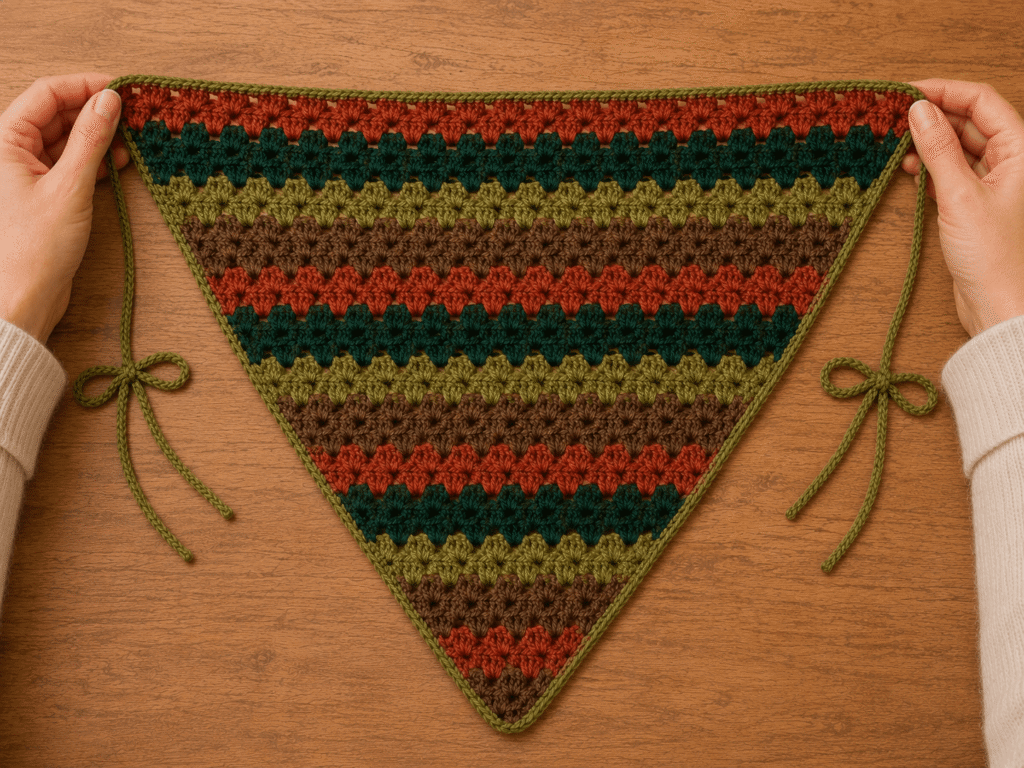
Before adding the ties, work a single round of slip stitch or single crochet in Olive Sage Green (C3) along both angled side edges. This cleans up the stepped edge created by the granny stitch row ends and gives a tidy, consistent edge for the ties to attach to.
Attach Olive Sage Green at the top right corner. Work 1 sc into each row end stitch down the right angled edge to the bottom point. Work 3 sc into the bottom point stitch. Work 1 sc up the left angled edge to the top left corner. Fasten off.
The Olive Sage Green border provides a subtle, cohesive frame that pulls the earthy color palette together at the edges — mirroring the tie color that will be added at each corner.
Step 5: Add the Olive Green Chain Ties
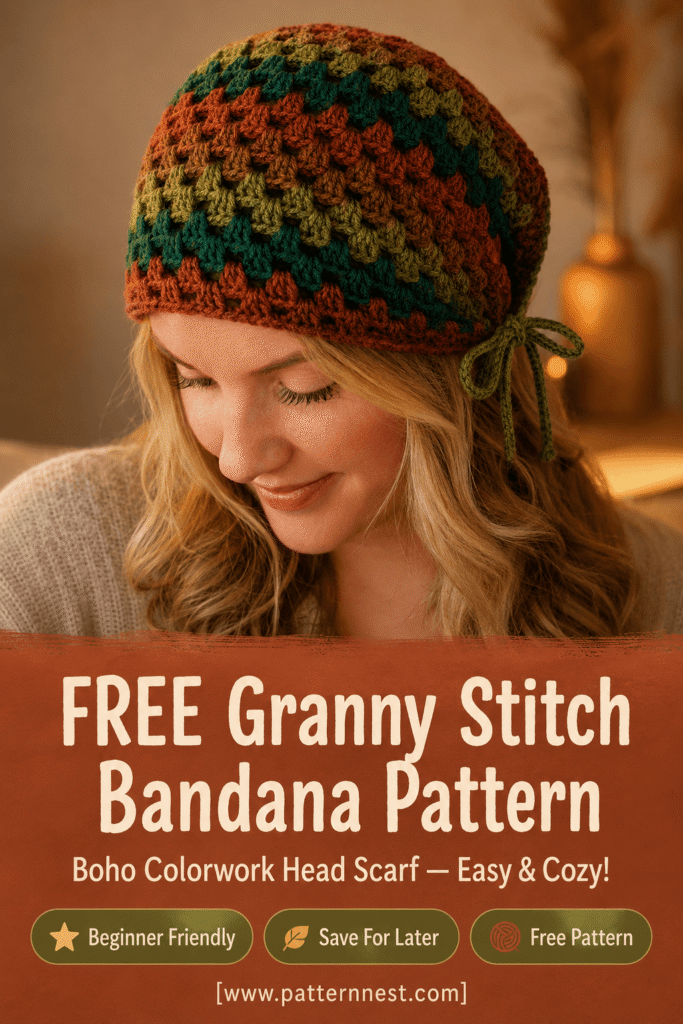
The simple crocheted chain ties are the finishing touch that makes this bandana a practical, wearable accessory — and the small bow visible at the side of the head in the reference image is one of the most charming details of the finished piece.
Attach Olive Sage Green (C3) at the top right corner of the bandana.
Chain 60 stitches. Work 1 sl st back along the entire chain to create a firm, rounded cord. Fasten off and weave in the tail.
Repeat at the top left corner — attach Olive Sage Green and chain 60, sl st back along the chain, fasten off.
Each finished tie should be approximately 10 to 12 inches long — enough to cross at the back of the head and tie in a small bow at one side near the ear, just as in the reference image.
Alternatively: For softer, more flexible ties, simply chain 80 without the sl st return row — a plain chain tie has a looser, more casual drape and is even faster to make.
Step 6: Weave in All Ends and Style
Use your tapestry needle to weave in every color-change yarn tail carefully through the wrong side of the bandana. With 4 rotating colors and multiple rows, there will be approximately 14 to 20 ends to weave in — budgeting 20 to 30 minutes for this step. Work each tail in at least two directions to secure it against the pull of wearing and washing. Trim all tails close to the surface.
To wear: Drape the bandana over the head with the straight top edge across the crown. Bring both ties around to one side or to the back. For the look in the reference image, cross the ties behind the head, bring them forward to one side, and tie in a small bow near the ear — the Olive Green bow sits neatly just above and behind the ear for a vintage, romantic bandana silhouette.
The wool or wool-blend fabric will soften and become even more beautifully draped with each wear. Machine wash cold on gentle, lay flat to dry to preserve the shape and color vibrancy of the four earthy tones.
Helpful Tips
- Write out your color sequence and stick it where you can see it. Four rotating colors is simple in theory but easy to lose track of mid-session — especially after a break. A sticky note reading “C1 Terracotta → C2 Forest → C3 Olive → C4 Mocha → repeat” pinned near your work saves constant mental recounting.
- Cut each color as you leave it rather than carrying it. Granny stitch rows in four colors produce a clean result when each color is cut and reattached rather than carried along the edge. The ends are easy to weave in and the result is much neater than carried yarn, which can show on the edge of the bandana.
- Keep your granny stitch clusters consistent in size. The beauty of this bandana comes from the evenness of the granny clusters — each (3dc, ch1) group should be approximately the same size throughout. If you notice your clusters getting looser or tighter between color sessions, consciously return to your baseline tension before continuing.
- Work the sl st tie return row at a looser tension. The slip stitch cord tie can become very stiff if worked tightly. Use a relaxed hand on the sl st return row — the cord should be firm but flexible. If the tie feels stiff or difficult to knot, try going up one hook size (5.5 mm) for the tie only.
- Block lightly before first wear. A light wet block — simply misting the finished bandana with water, smoothing it flat, and allowing it to dry — opens up the granny clusters slightly and gives the Olive Green border and ties a cleaner, more finished appearance. It takes 5 minutes and makes a visible difference.
Common Mistakes to Avoid
- Working into the top of a dc instead of the ch-1 space. The granny stitch requires each new cluster to be worked into the ch-1 space between the previous clusters — not into the tops of the dc stitches themselves. Working into the dc tops collapses the stitch structure and produces a very different, denser fabric. Always insert your hook into the ch-1 space.
- Losing the color rotation sequence. With four colors rotating, it is easy to accidentally repeat a color or skip one after a break. Keep a written record and mark off each row as you complete it. Using a different color for each stitch marker (if you have them) to visually track the rotation is also helpful.
- Decreasing on every row including color-change rows. The decreasing rhythm needs to be consistent — one cluster removed from each end per row. If you accidentally decrease twice on the same row or skip a decrease row, the triangle edges will be uneven. Count your clusters at the end of each row.
- Ties that are too short to tie comfortably. Ties shorter than 55 chains are often too short to cross behind the head and tie in a proper bow at the side. Chain generously — 60 to 70 chains — and trim after tying if needed.
- Weaving in ends too hastily. With 4 colors and many row-end tails, it is tempting to rush the finishing. Each tail must be woven in securely — at minimum through 4 to 5 stitches in two different directions. A tail that pulls free during wearing unravels the adjacent stitch and creates a visible hole in the granny cluster.
Final Thoughts
The Classic Granny Stitch Boho Bandana is autumn in your hands. The Terracotta, Forest Green, Olive, and Mocha stripe rotation feels like a walk through an October forest — and the finished bandana wears like one too. Warm, relaxed, earthy, and completely handmade.
It is also a reminder that the most beloved stitches in crochet are beloved for a reason. The granny stitch has been bringing joy to makers for generations, and wearing it in a four-color striped bandana on a crisp autumn morning is as good a reason as any to fall in love with it all over again.
Save This Pattern For Later
Can’t stop thinking about this Granny Stitch Bandana? Pin it to your Crochet Accessories or Autumn Crochet Projects board on Pinterest so you always have it for the next time the leaves start to turn. Share it with every crocheter you know who loves earthy tones and quick, wearable projects — this one was made to be made again and again in every season’s palette.