Crochet Scalloped Daisy Granny Square Bandana
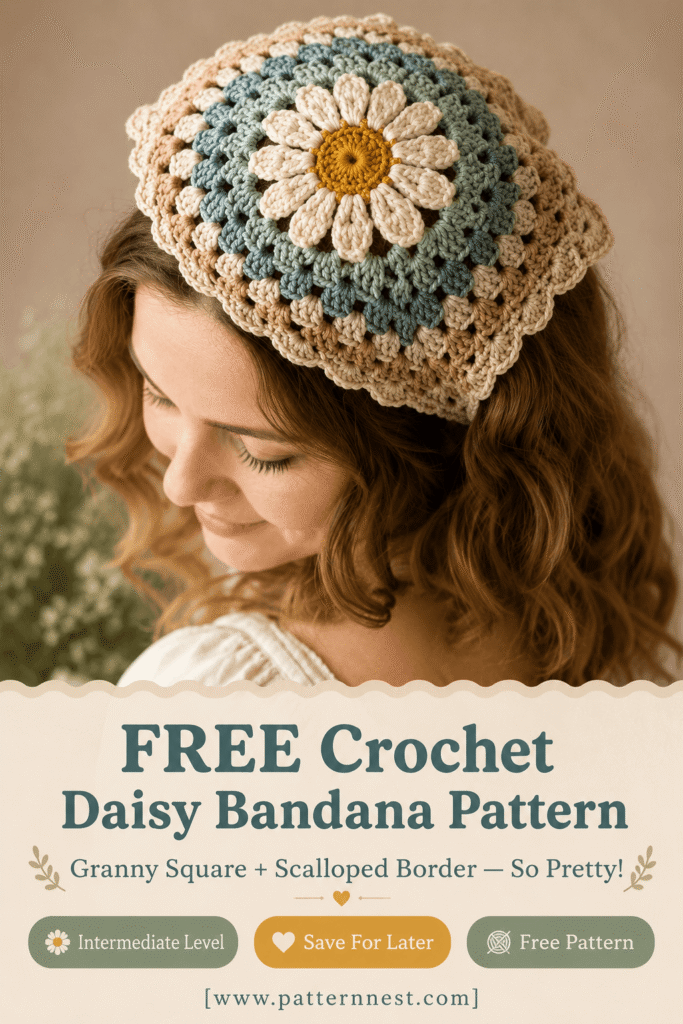
The Prettiest Crochet Bandana Ever — Daisy Granny Square with Scalloped Border
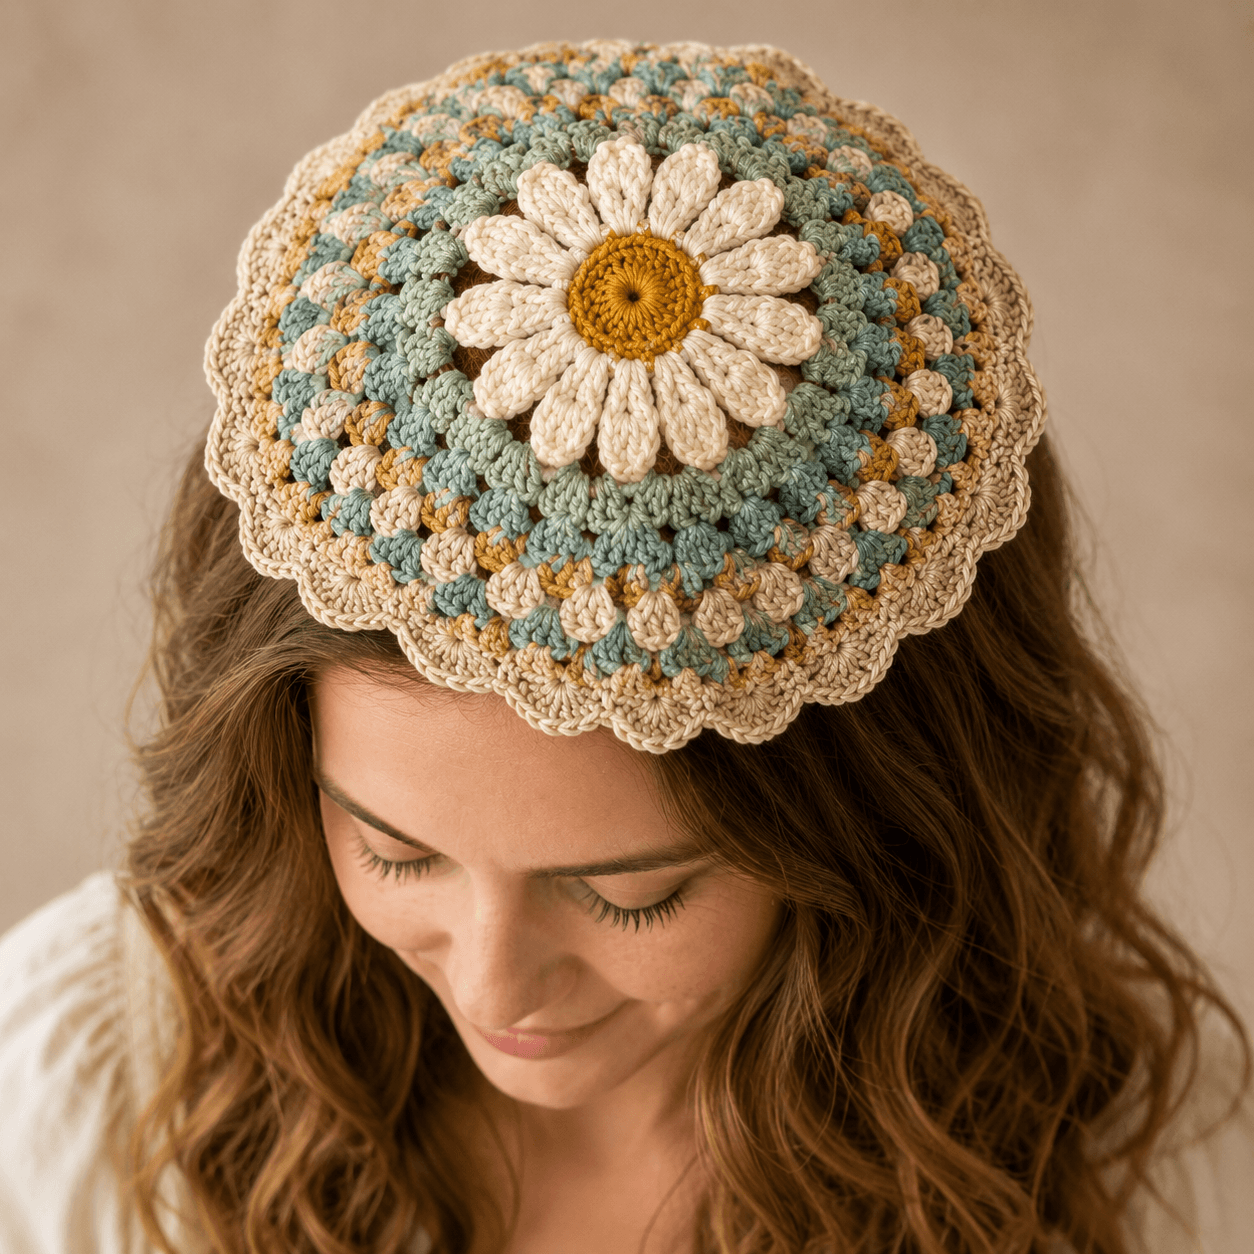
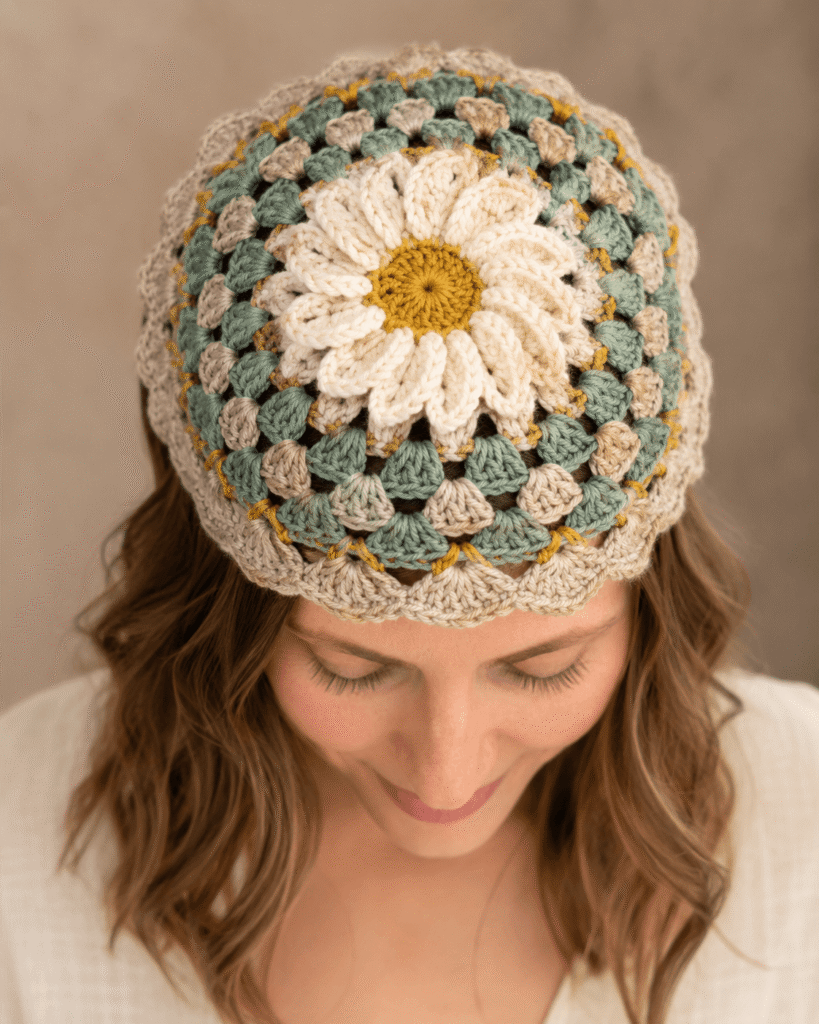
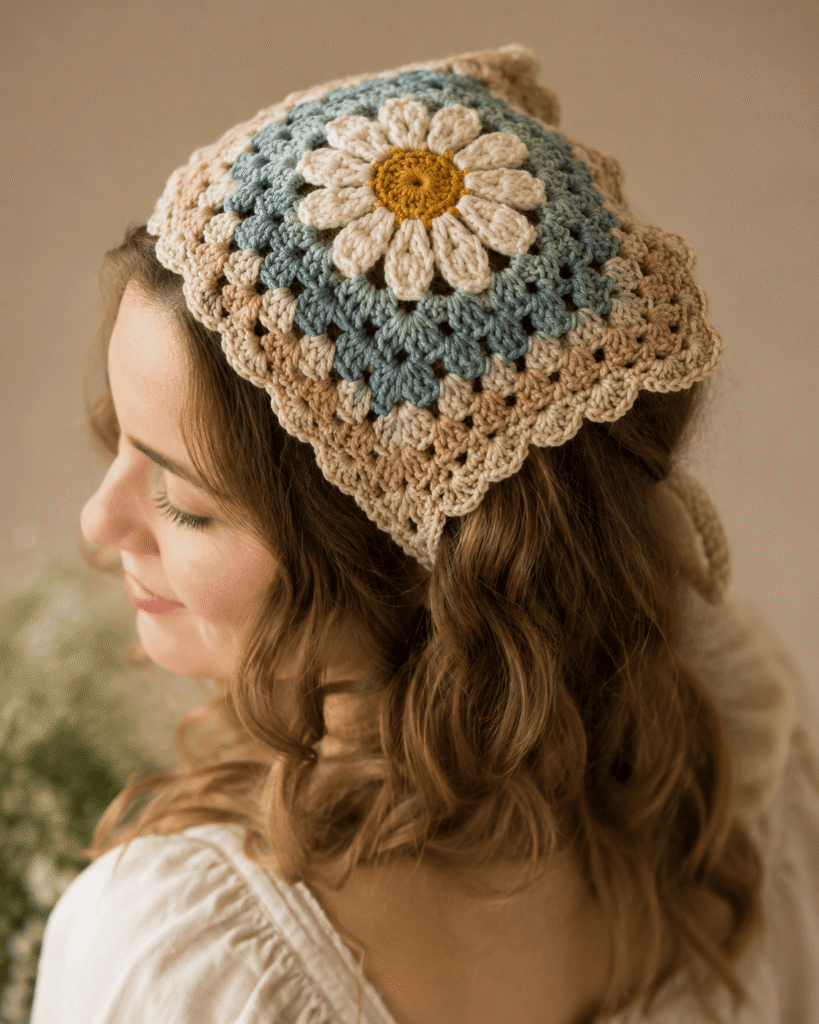
If you have been searching for a crochet project that is equal parts whimsical, wearable, and completely show-stopping, you have just found it. The Scalloped Daisy Granny Square Bandana combines everything wonderful about classic granny square crochet with a stunning layered daisy center motif and a dreamy scalloped shell-stitch border — all folded into a vintage-inspired bandana that sits flat and beautiful on the crown of the head.
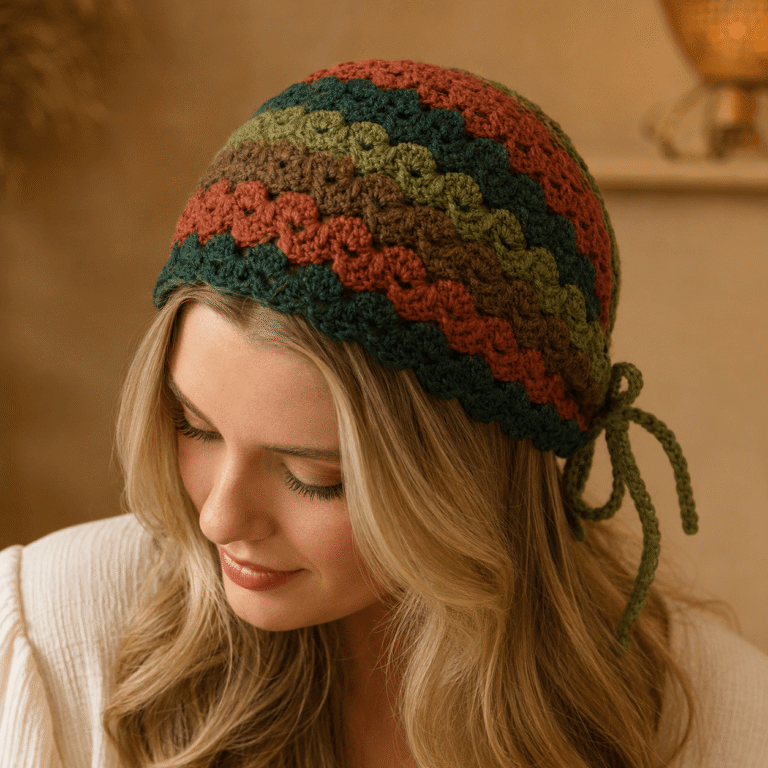
The color palette is pure cottagecore magic: a Cream White daisy with a Mustard Yellow center, expanding granny square rounds in Dusty Blue-Green and Warm Sand, with soft Mustard Yellow accent rounds adding warmth between the color bands. The scalloped Sand border frames the whole square in a gentle, feminine shell-stitch wave that makes the finished piece look like something from a handmade boutique.
This is an intermediate pattern — the daisy center motif has more steps than a standard granny square start, and the multi-color construction requires some color management. But every technique used is accessible to any crocheter who has completed a granny square before. The results are so beautiful that this bandana tends to become the most-complimented handmade accessory you own.
Frequently Asked Questions
Is this daisy granny square bandana beginner friendly?
This pattern is rated intermediate, primarily because of the layered daisy center motif and the multi-color construction. If you have made a granny square before and are comfortable with color changes, double crochet clusters, and working into chain spaces, you will be very comfortable with this pattern. The granny square rounds that expand outward from the daisy center are traditional granny square construction — if that is familiar territory, only the daisy center and the scalloped border are new techniques to learn. Both are explained in full detail in the tutorial.
What yarn works best for this bandana?
A smooth, structured DK or light worsted weight yarn in a cotton or cotton-acrylic blend gives the best stitch definition for the daisy petals, granny square clusters, and scalloped border. The petal detail of the daisy center especially requires a yarn with enough body to hold its shape when the petals are folded forward. Paintbox Simply DK, Lion Brand 24/7 Cotton, Scheepjes Stonewashed (light worsted), or similar smooth yarns in the four color palette work beautifully. Avoid fuzzy, textured, or bouclé yarns — they will obscure the daisy petal detail entirely.
How long does this bandana take to crochet?
Most intermediate crocheters complete this project in 6 to 9 hours. The daisy center motif is the most intricate section and takes approximately 1.5 to 2 hours on its own. The expanding granny square rounds move quickly once the center is established. The scalloped border is worked in a single round and takes 30 to 45 minutes. Plan for a comfortable weekend project — the bandana can realistically be completed from start to finish over a Saturday and Sunday.
What size will the finished bandana be?
The finished granny square measures approximately 12 to 13 inches across from corner to corner. When folded diagonally into a bandana shape, it sits beautifully on the crown of the head with approximately 5 to 6 inches of depth from the forehead edge to the crown, fitting most adult head sizes. The scalloped border adds approximately half an inch of additional framing on all sides. If you want a slightly larger bandana, work one or two additional granny square rounds before beginning the scalloped border.
Can I use different colors?
Absolutely. The Cream, Mustard, Dusty Blue-Green, and Warm Sand palette gives this bandana its distinctive vintage cottagecore charm, but the same construction works in any color combination. Popular alternative palettes include dusty rose, sage, and cream; terracotta, rust, and ivory; or lavender, soft yellow, and white. The daisy center always looks most striking when the petals are a light or bright color against a darker granny square body — keep that contrast in mind when choosing your custom palette.
Materials Needed
The following materials are selected for the best daisy petal definition, stitch clarity, and the soft, wearable drape the finished bandana requires.
Yarn:
- Color 1 (C1) — Cream White: approximately 60–70 yards. Used for the daisy petals. Needs to be a smooth, slightly structured yarn so petals hold their shape when folded forward.
- Color 2 (C2) — Mustard Yellow / Amber Gold: approximately 30–40 yards. Used for the daisy center and for the accent color rounds between granny square bands.
- Color 3 (C3) — Dusty Blue-Green / Sage Teal: approximately 80–100 yards. The primary granny square body color filling most of the expanding rounds.
- Color 4 (C4) — Warm Sand / Soft Beige-Tan: approximately 80–100 yards. Used for the secondary granny square rounds and the full scalloped shell-stitch outer border.
All yarn should be DK or light worsted weight, smooth finish, cotton or cotton-acrylic blend.
Tools and Notions:
- 4.0 mm (G/6) crochet hook
- Scissors
- Tapestry needle — for weaving in color-change ends (there will be several)
- Stitch markers — to mark the four corners of the granny square
- Measuring tape
- Two lengths of yarn or ribbon for ties — approximately 25–28 inches each, in Warm Sand or Cream White, for the bandana neck ties
Why cotton or cotton-acrylic? Cotton has natural structure that supports the daisy petals beautifully and gives the granny square clusters crisp definition. It is also breathable and lightweight — important qualities for a head accessory worn in warmer weather. A cotton-acrylic blend adds slight elasticity to the cotton’s structure, making it easier to work with while maintaining the stitch clarity cotton provides.
Skill Level
Skill Level: Intermediate Stitches Used: Magic ring, Chain (ch), Slip stitch (sl st), Single crochet (sc), Double crochet (dc), Treble crochet (tr), Double crochet clusters (dc-cl), Shell stitch (for scalloped border), Color changes Estimated Time: 6–9 hours Finished Dimensions: Square approximately 12–13 inches; bandana fits most adult heads
Step-by-Step Tutorial
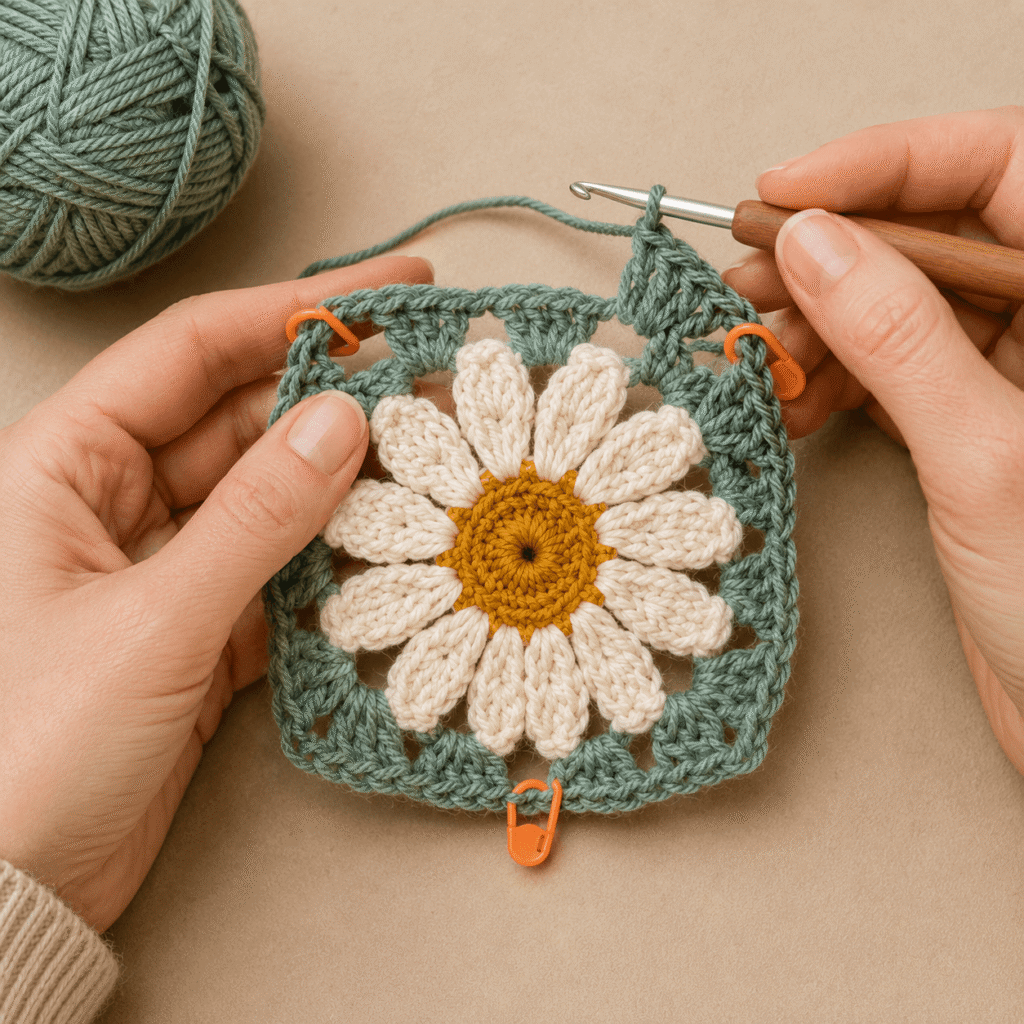
Step 1: Crochet the Daisy Center — Mustard Yellow Base and Cream White Petals
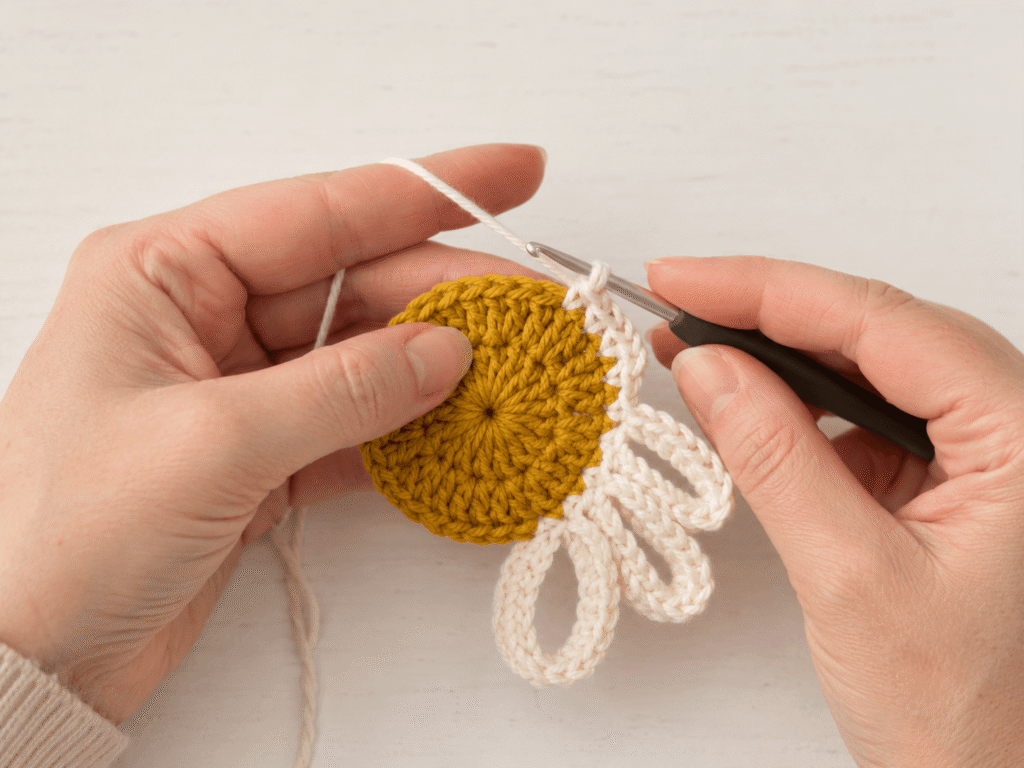
The daisy center is the heart of this bandana and the feature that makes it so distinctive. It is worked in two layers: a Mustard Yellow base disc, and a ring of Cream White petals that fold forward over the base to create the dimensional daisy appearance.
Mustard Yellow center disc: Using Mustard Yellow (C2) and your 4.0 mm hook, make a magic ring. Round 1: Ch 3 (counts as dc), work 11 dc into the ring. Join with sl st to top of ch-3. (12 dc) Round 2: Ch 3, dc in same stitch, 2 dc in each stitch around. Join. (24 dc) Round 3: Ch 3, dc in same stitch, *dc in next stitch, 2 dc in following stitch* repeat around. Join. (36 dc) Fasten off Mustard Yellow. The center disc should be a small, firm, flat circle approximately 2 to 2.5 inches across.
Cream White petals (worked into the back loops of Round 3): Attach Cream White (C1) to any stitch of Round 3, working into back loops only throughout. *Ch 12, sl st in 2nd ch from hook, sc in next ch, hdc in next ch, dc in next 4 ch, hdc in next ch, sc in next ch, sl st in last ch, sl st into next 2 stitches of the disc* repeat around the entire disc edge. This creates one elongated pointed petal with each repeat. Work approximately 12 petals evenly spaced around the disc.
Once all petals are worked, gently fold each Cream White petal forward toward the front of the disc so the Mustard Yellow center is visible from the front and the petals radiate outward and slightly upward, creating a realistic daisy appearance. The petals will naturally hold their forward-folded position. Fasten off and weave in ends.
Step 2: Build the First Granny Square Rounds in Dusty Blue-Green
With the daisy center complete, you will now build the traditional granny square outward from it.
Round 1 (Granny square foundation): Attach Dusty Blue-Green (C3) to any point between two petals at the outer edge of the daisy center. The daisy center becomes the center of your granny square.
Ch 5 (counts as dc + ch 2), *work 3 dc cluster into the next open space between petals, ch 2* repeat at 4 evenly spaced points around the daisy to establish the 4 corners of the square. End each corner with ch 2. You are essentially treating every 3rd petal gap as a corner position. Join with sl st to 3rd ch of beginning ch-5.
Round 2: Sl st into corner ch-2 space. Ch 3, (2 dc, ch 2, 3 dc) into corner space — this is your first corner cluster. *Ch 1, (3 dc, ch 2, 3 dc) into next corner ch-2 space* repeat 3 times. Join. Fasten off Dusty Blue-Green.
Round 3 (Mustard Yellow accent): Attach Mustard Yellow (C2). Work one round of traditional granny square — 3 dc clusters at each corner with ch-2, and 3 dc clusters with ch-1 along each side. Join. Fasten off Mustard Yellow.
Step 3: Continue Expanding Granny Square Rounds
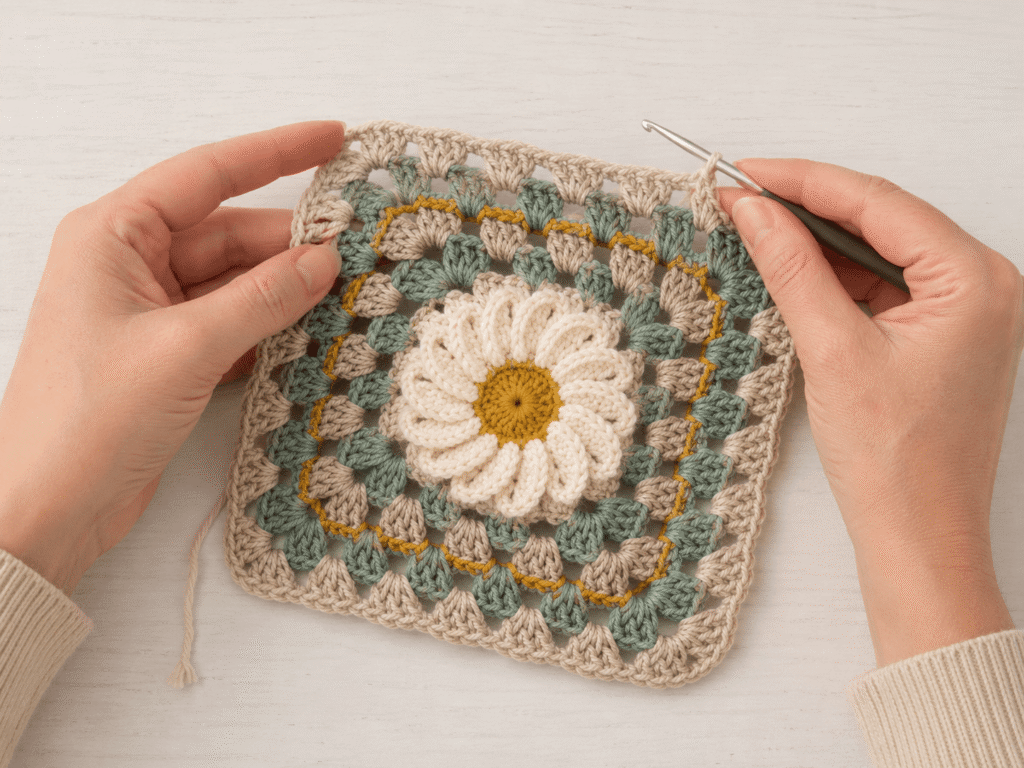
Continue building the granny square outward, alternating color bands to create the striped expanding-square pattern visible in the reference image.
Round 4–5: Attach Dusty Blue-Green (C3). Work 2 full rounds of traditional granny square construction — 3 dc corner clusters with ch-2, and 3 dc side clusters with ch-1. Add one new cluster group per side on each round. Join at the end of each round. Fasten off.
Round 6: Attach Warm Sand (C4). Work 1 round of traditional granny square. Join. Fasten off.
Round 7–8: Attach Dusty Blue-Green (C3). Work 2 more rounds. Fasten off.
Round 9: Attach Mustard Yellow (C2). Work 1 accent round. Fasten off.
Round 10–11: Attach Warm Sand (C4). Work 2 full rounds to build out the Sand border band. Fasten off.
Continue adding rounds in this alternating color sequence — Blue-Green main rounds, punctuated by single Mustard Yellow and Warm Sand accent rounds — until your square measures approximately 11 to 12 inches from corner to corner. End with a Warm Sand round so the square is ready for the scalloped border.
Step 4: Work the Scalloped Shell-Stitch Border in Warm Sand
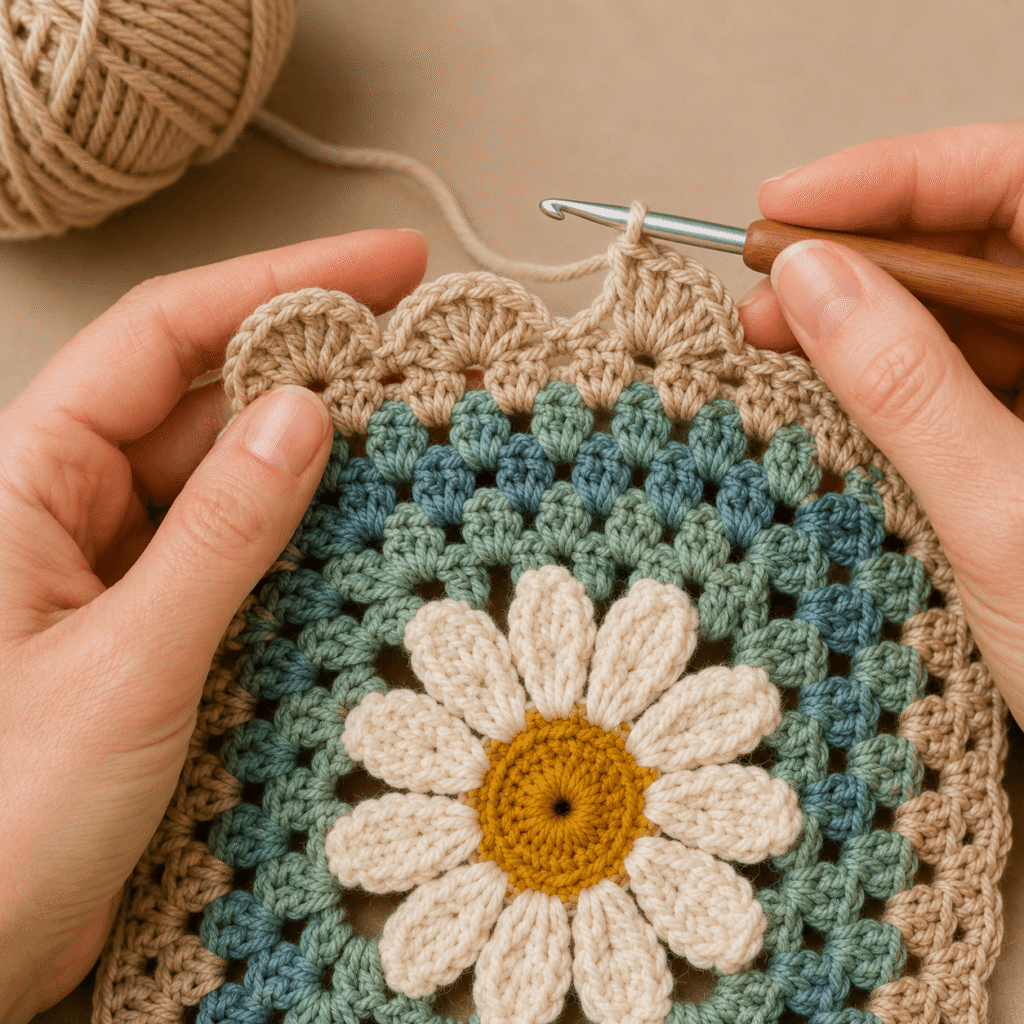
The scalloped border is what gives this bandana its feminine, vintage character — and it is one of the most satisfying rounds to work because the shell stitches create an instant, dramatic transformation along every edge.
Attach Warm Sand (C4) to any corner ch-2 space of the completed granny square.
Scalloped border round: *(Sc, ch 1, 5 dc, ch 1, sc) into the corner ch-2 space — this creates one large scallop shell at each corner. Then working along the side: *skip 1 stitch or ch-1 space, sc into next space, skip 1, 5 dc into next space* repeat across each side edge to the next corner, placing shells evenly spaced. Repeat from * at each corner and across each side.*
Work this scalloped shell round all the way around all four sides and four corners of the square. Join with a slip stitch. Fasten off Warm Sand and weave in all remaining ends.
The scalloped border should create a wave of small, even shell-stitch fans all the way around the perimeter of the square, with slightly larger corner shells at each of the four corners — exactly as visible in the reference image.
Step 5: Block and Shape the Bandana
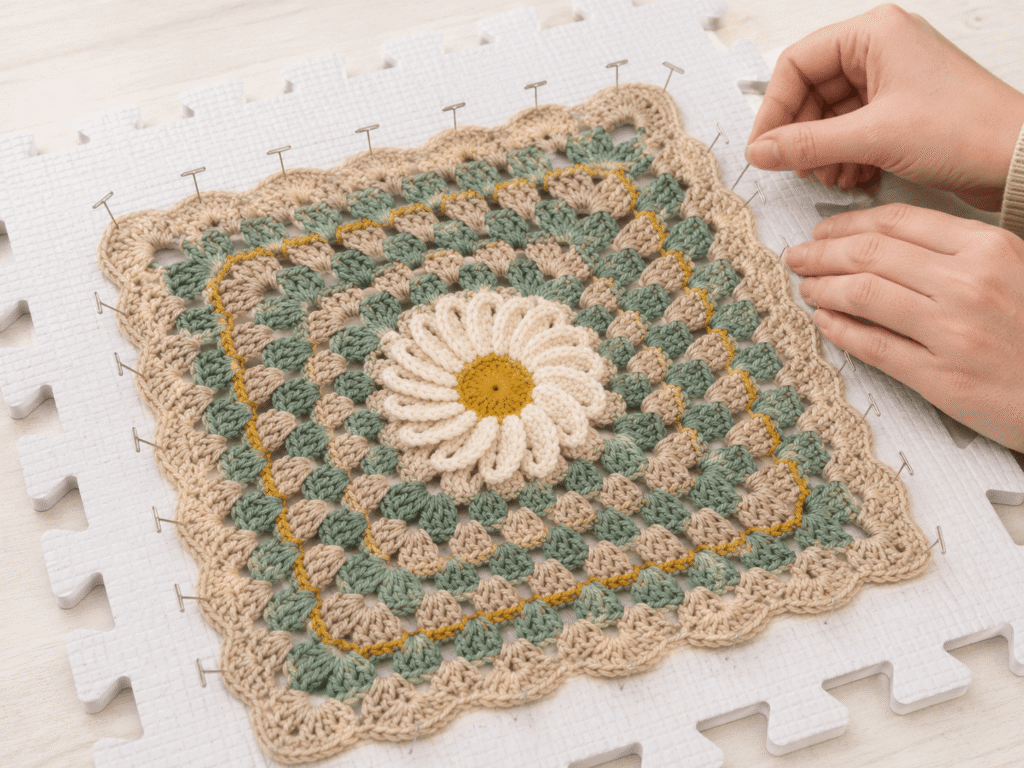
Before wearing, the finished daisy granny square bandana benefits from a gentle wet block to settle the granny square clusters, open the lace spaces between rounds, and flatten the square into its final even shape.
Wet blocking: Submerge the finished square in cool water for 10 minutes. Gently squeeze out excess water. Lay flat on a blocking mat and pin to a true square shape — all four sides even, corners at 90 degrees. Use T-pins along each edge. Allow to dry completely flat.
Once blocked and dry, fold the square diagonally — corner to corner — to form the bandana triangle shape. The daisy center should sit at the front-center of the folded triangle, facing forward. The two side corners of the fold become the top corners that go over the crown of the head, and the front corner point hangs forward over the forehead or folds under.
Step 6: Attach Ties and Style Your Bandana
To complete the bandana, attach ties at the two top corners of the folded square so it can be secured at the nape of the neck.
Crochet tie method: At each top corner of the square, attach Warm Sand yarn and chain 65 to 70 stitches. Work 2 rows of sc back over the chain for a flat, finished tie. Fasten off. Repeat at the other top corner.
Ribbon tie alternative: Thread a 28-inch length of Cream White or Sand ribbon through the corner stitch at each top corner and knot to secure. A soft grosgrain or satin ribbon in a complementary neutral works beautifully with this color palette.
To wear: Place the folded bandana over the crown of the head with the daisy motif centered on the forehead. Pull the two tie ends behind the head and tie in a bow at the nape of the neck. Adjust the front fold and scalloped border so they frame the face symmetrically.
Helpful Tips
- Work the daisy petals loosely. The Cream White petals need to be long and relaxed enough to fold forward over the Mustard Yellow center naturally. If your petals feel stiff or are pulling the center disc out of shape, try working the petal chain stitches slightly looser or go up half a hook size just for the petal section.
- Weave in ends as you go between every color change. This bandana involves many color changes. Weaving in tails immediately after each color join — before continuing the next round — keeps the wrong side tidy and makes the final finishing session much faster and less overwhelming.
- Mark your four corners with stitch markers from Round 1. The most common granny square mistake is losing track of which chain-2 spaces are corners vs. side spaces. Mark all four corners with locking stitch markers from the very first granny round and move them up each round. This keeps your corner positioning accurate throughout the entire construction.
- Check your square is truly square at Round 5 and Round 10. Tension can drift slightly over many rounds of granny square construction. Measure your square at regular intervals — diagonal corner to corner should be equal in both directions. Wet blocking will correct minor distortion, but catching significant drift early prevents major issues.
- The daisy petals look best with a gentle press after blocking. Once the bandana is dry after blocking, gently reshape each petal with your fingers — pulling each one to its full length and arranging them evenly around the Mustard Yellow center. The petals are the centerpiece of the whole design and deserve this final attention.
Common Mistakes to Avoid
- Working the daisy petals in the wrong loop. The petals must be worked into the back loops only of the daisy center disc. Working into both loops locks the petals flat against the disc and prevents them from folding forward. Back loop only is essential for the three-dimensional petal effect.
- Placing granny square corners unevenly. If the four corner positions are not established evenly around the daisy center in Round 1, the square will grow asymmetrically and no amount of blocking will fully correct it. Take time to space the four corners evenly — approximately 6 petal gaps apart — before beginning Round 1.
- Inconsistent tension between color rounds. When joining a new color after fastening off, many crocheters work the first few stitches of the new color at a slightly tighter or looser tension. Consciously match your tension to the existing fabric each time you join a new color.
- Making the scalloped border too tight. A border worked with tight tension will pull the edges of the square inward and prevent it from lying flat. Work the shell stitches of the scalloped border with relaxed, even tension — if the square edges start to ruffle or pull in, adjust immediately.
- Skipping the blocking step. Granny squares benefit enormously from blocking. An unblocked granny square bandana will have slightly curled edges, uneven tension visible between rounds, and a stiffer drape than the finished blocked piece. The blocking step is quick and the transformation is significant — always block before wearing or gifting.
Final Thoughts
The Scalloped Daisy Granny Square Bandana is proof that granny squares have never gone out of style — they have just been waiting for the right pattern to remind us all how beautiful they can be. The combination of the layered daisy center, the soft cottagecore color palette, and the scalloped shell-stitch border creates an accessory that feels both vintage and completely fresh.
Wear it on a summer walk. Wear it to a farmers market. Wear it in your hair for a boho bridal shoot. Give it as the most beautiful handmade gift anyone has ever received. However it is used, the Scalloped Daisy Granny Square Bandana will be treasured.
Save This Pattern For Later
In love with this daisy granny square bandana? Pin it to your Crochet Accessories or Cottagecore Crochet board on Pinterest so you can make it in every colorway. Share it with every granny square lover in your life — this is the pattern that turns granny square skeptics into granny square devotees.